
Last Updated: November 7, 2026
Quick Summary
To clean vintage camera lens glass without damage, blow away loose grit first, then brush and wipe gently with a clean microfiber cloth, and apply fluid to the cloth or swab rather than the lens. Vintage glass has soft coatings and cemented groups, so you clean vintage camera lens surfaces with the least contact and fluid possible and stop once the glass is clear.
- Skip canned compressed air; a hand blower with a one-way valve lifts grit without touching glass.
- Wipe in straight strokes from the center outward, since circles can leave a visible pattern on soft coatings.
- Use a new cotton swab for each pass when cleaning surface fungus so you do not spread spores or grit.
- Never wipe a lens you have not blown first, because grit under a cloth acts like sandpaper.
- Stop and seek professional service if you see threads behind the front glass or a fog that returns after wiping.
Table of Contents
- Why Vintage Lens Glass Needs a Different Cleaning Approach
- vintage lens cleaning tools: What You Actually Need
- Step-by-Step: The Safe Cleaning Sequence
- How to Remove Smudges from Camera Lens Glass
- How to Clean Fungus from a Camera Lens
- Vintage Lens Cleaning Mistakes to Avoid
- When to Stop Cleaning and Seek Professional Help
- Prevention, Storage, and Maintenance Frequency
- Book a Professional Lens Inspection with Kameratalk
- Frequently Asked Questions
Why Vintage Lens Glass Needs a Different Cleaning Approach
Learning how to clean vintage camera lens glass starts with one uncomfortable truth: the glass on an old lens is not the same glass on a new one, so you must clean vintage camera lens glass with care. Vintage optics often carry soft single coatings, older Canada balsam cement between elements, and paint that thins with age. Aggressive cleaning that would be fine on a modern multicoated lens can strip a 1970s coating in seconds.
A lens that looks clean but was scrubbed with the wrong cloth can show faint scratches across the front element, and those scratches scatter light in a way that flattens contrast.
Here is the core idea behind everything below: vintage lens glass is preserved, not scrubbed. You remove what sits on top of the glass and stop there.
Three things make old glass fragile:
- Soft coatings. Early single coatings scratch far more easily than modern hardened ones.
- Cemented groups. Solvents that seep into the barrel can attack the balsam holding elements together.
- Brittle plastics and paint. Old aperture rings and name rings crack or fade with harsh chemicals.
That is why the safe cleaning sequence in this guide is built around the least contact possible.
vintage lens cleaning tools: What You Actually Need
The right vintage lens cleaning tools are few and cheap. You do not need a kit with twenty bottles. You need four or five items, used in the right order, and you need to know which tool fits which kind of dirt, because using the wrong one on old glass is how coatings get stripped.
Tools for Loose Dust and Grit
- A rubber air blower. The single most important tool. It lifts grit without touching glass. A hand blower with a one-way valve is worth the small extra cost because it will not suck dust back into the bulb.
- A soft lens brush. Camel hair or a clean synthetic brush for the last specks. Retract or cap it after use so the bristles do not pick up grit from your bag.
- A bright LED torch. Angle it across the glass to see dust you would otherwise miss. A phone torch works; a small penlight is easier to aim.
Skip canned compressed air. It can spit propellant onto the coating and chill the glass unevenly. A hand blower is safer and quieter.
Cloths, Swabs, and Fluids for Stubborn Marks
- Microfiber cloths. Clean, washed, and stored in a bag. One scratch from a gritty cloth is permanent. Wash them without fabric softener and let them air-dry.
- Cotton swabs. For edges and the recessed area around the front element. Use fresh swabs; a used one is a grit carrier.
- Lens-cleaning fluid. A proper optical cleaner, not window cleaner. Look for a fluid sold for coated optics rather than a general-purpose cleaner.
- Isopropyl alcohol. Useful for oil and fingerprints, but use it sparingly on vintage coatings. Dilute it if the label allows, and never flood the glass.
A simple rule we follow: the fluid goes on the cloth or swab, never on the lens. More on that in the sequence below.
Tool and Solvent Comparison by Use Case
Most guides list tools without saying when each one is the wrong choice. Here is the comparison that matters for old glass:
- Air blower, loose dust only. Safe on every coating and every material. Will not remove oil, fingerprints, or haze. If the blower does not shift it, stop blowing and move on.
- Soft brush, last specks after blowing. Safe on most coatings, but a brush that has picked up grit can scratch. Clean or replace it regularly. Do not press the bristles into the glass.
- Microfiber cloth, light smudges and final wipe. Safe on intact coatings; risky on a coating that is already flaking or sleeking, where even light pressure can lift more. Use a clean section of the cloth for each pass.
- Cotton swab, edges and recessed areas. Safe with a trace of fluid; the risk is pressing too hard into the element edge where fluid can pool.
- Lens-cleaning fluid, oil, fingerprints, residue. Formulated for coated optics, but vintage single coatings are softer than modern hardened ones. Apply to the cloth, dab, and check before repeating.
- Isopropyl alcohol, oil and fingerprints. Effective, but the most aggressive common solvent on old paint, plastic, and balsam cement. Keep it away from the barrel edge and never soak the glass. On an unknown lens, test a tiny amount on the edge of the coating first.
Watch out: a solvent that is fine on a modern multicoated lens can soften old Canada balsam cement or lift thinning paint on a name ring, so treat every fluid as a last resort on an unknown vintage lens.
If you are still building a kit, our essential accessories for new camera owners covers the basics worth buying first.
Each tool has one job on old glass, and using the wrong one is how coatings get stripped.
| Tool | Best for | Key difference |
|---|---|---|
| Air blower | Loose dust only | Safe on every coating; will not remove oil or fingerprints |
| Soft brush | Last specks after blowing | Safe on most coatings; grit in bristles can scratch |
| Microfiber cloth | Light smudges and final wipe | Risky on flaking or sleeking coatings |
| Cotton swab | Edges and recessed areas | Safe with a trace of fluid; do not press hard |
| Lens-cleaning fluid | Oil, fingerprints, residue | Apply to cloth, dab, check before repeating |
| Isopropyl alcohol | Oil and fingerprints | Most aggressive common solvent; test on coating edge first |
Step-by-Step: The Safe Cleaning Sequence
The safe cleaning sequence moves from zero contact to light contact to fluid, and stops the moment the glass is clear. Follow the order exactly.
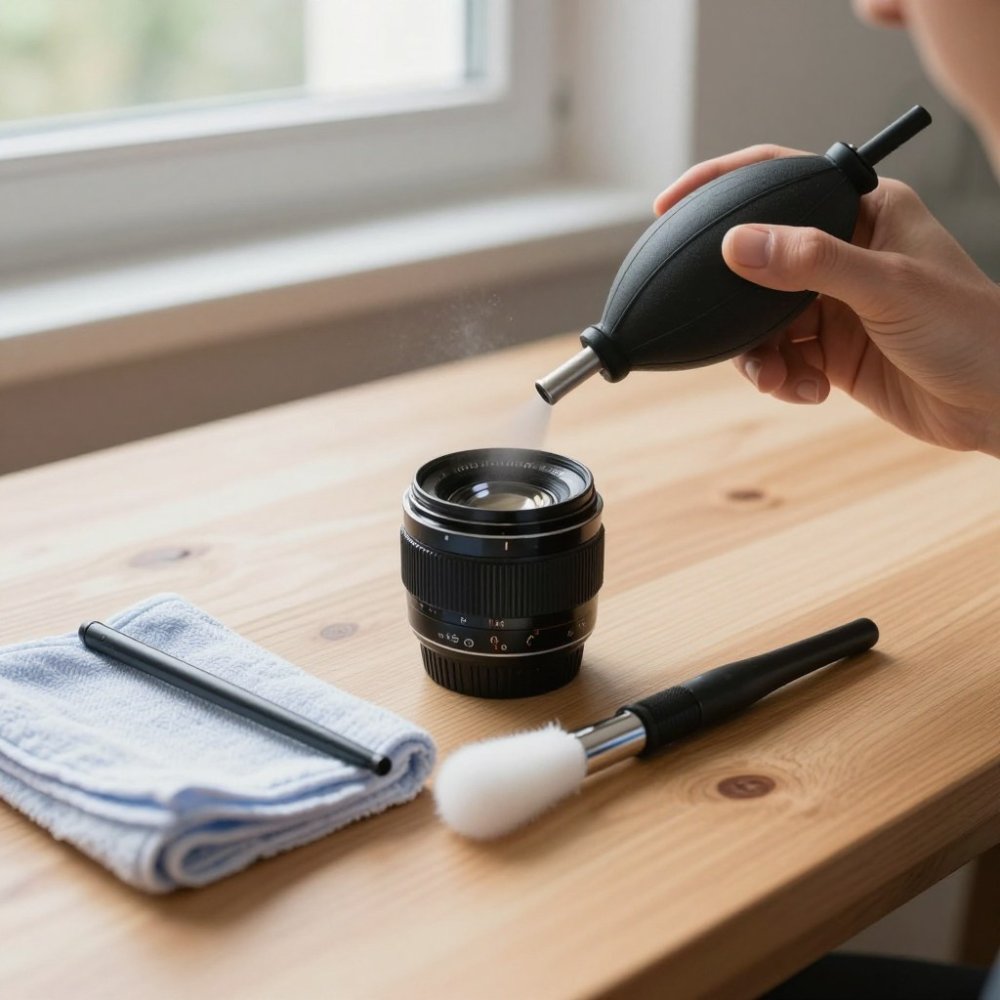
Step 1: Blow Away Loose Dust and Grit
Hold the lens face-down and squeeze the blower in short bursts. Angle the nozzle so dust falls away from the glass, not across it. Work around the front element and the rear element.
Never wipe a lens you have not blown first. Grit trapped under a cloth acts like sandpaper.
Step 2: Brush and Wipe Gently
Use the lens brush to sweep remaining specks toward the edge. Then, if the glass still needs it, wipe with a clean microfiber cloth using light pressure and straight strokes from the center outward.
Straight strokes beat circular motion. Circles can leave a visible pattern on soft coatings.
Step 3: Apply Fluid to Cloth or Swab, Never the Lens
Put one or two drops of lens-cleaning fluid on the cloth or swab, not on the glass. Fluid applied directly can run to the element edge and seep into the barrel.
Dab the mark, let it sit for a moment, then wipe gently. One pass, check, repeat only if needed.
Expected result: the glass looks clear under angled light, with no smears and no new marks.
How to Remove Smudges from Camera Lens Glass
To remove smudges from camera lens glass, start with a dry microfiber cloth and light pressure. Most fingerprints lift with a dry wipe alone. Only reach for fluid if the mark stays.
Smudges are oil, and oil smears if you spread it. So dab first, then wipe:
- Breathe lightly on the glass to add a little moisture, then wipe with a clean cloth.
- If the smudge remains, add one drop of lens fluid to the cloth and dab the spot.
- For oil near the edge, use a cotton swab with a trace of isopropyl alcohol.
Watch out: pressing hard does not remove stubborn residue faster. It presses grit into the coating. If a smudge will not lift with gentle dabbing, stop and reassess.
How to Clean Fungus from a Camera Lens
To clean fungus from a camera lens, you first have to confirm it is fungus and not haze, dust, oil, or a scratch. That distinction decides whether surface cleaning can help at all, and it is the step most guides skip.
A Decision Tree for Dust, Haze, Fungus, Oil, and Scratches
Work through these in order under a bright torch, angled across the glass:
- Dust. Loose specks that move when you blow. Removable with a blower and brush. If it does not move, it is not dust.
- Oil and fingerprints. Smudges that smear when you wipe and sit on the surface. Removable with a cloth and a trace of fluid. If a mark stays put after a gentle dab, it is not oil.
- Haze. A uniform milky fog that returns after wiping, or that sits behind the front glass. Surface haze can sometimes be cleaned; haze between elements cannot. If it returns after a wipe, stop, it is internal.
- Fungus. Fine branching threads or a spiderweb pattern, often near the edges, sometimes with a faint matte look. Surface fungus on the front or rear element can sometimes be removed with a swab and a little lens fluid. Threads behind the front glass are between elements and need a technician.
- Scratches. Lines that catch a fingernail or stay visible at every angle and do not change when you wipe. No cleaning removes a scratch; cleaning only removes what sits around it.
Cleaning Surface Fungus Safely
If the threads are on the outer surface, work gently from the outside in with a fresh cotton swab and a trace of lens fluid. Use a new swab for each pass so you do not spread spores or grit. Dab rather than scrub, and check under the torch between passes.
Watch out: fungus can etch the coating and, over time, the glass itself, so if a pass does not lift the threads, stop rather than scrub harder, the etching is permanent and scrubbing only widens it.
When Surface Cleaning Will Not Work
Fungus often sits between elements, and no amount of external cleaning reaches it. The same is true of internal haze and separation in cemented groups. If you see threads behind the front glass, a fog that returns after wiping, or a milky edge, the lens needs professional service, not a stronger solvent.
Before you start, it helps to confirm the signs and severity. Our guide to the signs of fungus in vintage camera lenses walks through what to look for so you do not scrub a lens that needs professional attention.
Vintage Lens Cleaning Mistakes to Avoid
Most damage to old glass comes from a handful of repeat mistakes. Here are the vintage lens cleaning mistakes to avoid:
- Wiping before blowing. Grit under a cloth is the top cause of scratches.
- Using a dirty or paper cloth. Tissues and paper towels shed fibers and can scratch.
- Soaking the lens in fluid. Fluid runs into the barrel and can harm cement and lubricants.
- Using harsh solvents. Strong alcohol or acetone can strip paint and soften old cement.
- Cleaning the lens contacts with fluid. Keep the electrical contacts dry and clean separately.
- Over-cleaning. Every wipe carries a little risk. Clean only when the glass is actually dirty.
A common mistake is treating a vintage lens like a modern one. It is not. Less contact, less fluid, and more patience keep old coatings intact.
When to Stop Cleaning and Seek Professional Help
Stop cleaning the moment you see something surface cleaning cannot fix. That means:
- Threads or a web pattern behind the front glass.
- A milky fog that returns after wiping.
- Deep scratches that catch a fingernail.
- Loose glass or a rattling element.
- Fluid that has seeped inside the barrel.
Disassembly and internal element cleaning carry real risk. Old cemented groups can separate, and small screws and shims are easy to lose. Unless you have done it before, hand internal work to a technician.
If your lens is beyond safe cleaning, it may be time to replace it. Our 2026 guide to buying used lenses explains how to judge condition before you buy so you avoid a problem lens next time.
Prevention, Storage, and Maintenance Frequency
Prevention beats cleaning every time. Store lenses with caps on, in a dry place, away from heat and humidity. A small silica gel pack in your bag helps in damp weather.
How often should you clean? Only when needed. A quick blow after each shoot keeps dust from settling. A full clean is for when the glass actually shows marks, not on a fixed schedule.
For vintage glass you plan to keep, a few habits pay off:
- Keep a cap on the rear element at all times.
- Store lenses upright in a case, not loose in a bag.
- Avoid leaving lenses in a hot car or a damp basement.
- Check for fungus every few months with a torch.
If you are new to older gear, our tips for buying your first analog camera cover how to store and care for vintage lenses from day one.
Book a Professional Lens Inspection with Kameratalk
Some lenses deserve a trained eye, and vintage glass is often one of them. If you are unsure whether a mark is surface dust, fungus, or a coating problem, a professional inspection can settle it before you make it worse.
Some photographers prefer to have a trained eye check a lens, especially when it is unclear whether a mark is surface dust, fungus, or a coating problem.
Cleaning old glass is mostly about restraint: blow first, touch last, and stop early. If a lens looks risky, let an expert check it before you clean. Get started with Kameratalk and get a straight answer on your lens.
Frequently Asked Questions
How do you clean vintage camera lens glass safely?
Start by blowing away loose dust with an air blower, then use a soft lens brush for any remaining grit. Apply a small amount of lens-cleaning fluid to a microfiber cloth or cotton swab, never directly onto the glass, and wipe gently in straight strokes. Work from the center outward and stop if you feel resistance. Avoid rubbing hard or using paper products, which can scratch older coatings.
Can you use isopropyl alcohol on vintage camera lenses?
Isopropyl alcohol can remove oil and fingerprints, but it may damage some vintage lens coatings and plastic or painted parts if used carelessly. Dilute it and apply only to a cloth or swab, never soak the lens. Test on a small area first, and avoid alcohol on older uncoated or soft-coated glass. A dedicated optical cleaner is usually safer for regular use.
How can you tell whether a vintage lens has fungus or haze?
Shine a light through the lens and look for web-like filaments, spots, or a uniform cloudy film. Fungus often appears as branching threads, while haze looks like a milky layer on internal glass. If the problem is inside the lens, surface cleaning will not fix it. Stop cleaning and have a professional inspect it, since internal fungus can spread and etch the glass.
When should you stop cleaning a vintage camera lens and seek professional help?
Stop if you see scratches, internal haze, fungus, or separation between lens elements. Also stop if cleaning does not improve the view or if you feel grit under the cloth. Continuing can grind particles into the coating. A professional can assess whether the lens needs disassembly or internal cleaning, which carries risk of misalignment and should not be attempted at home.