Table of Contents
- Why the Right Camera Accessories Matter From Day One
- Memory Cards and Storage: SD Card Speed Classes Explained
- Camera Bags and Protective Cases: Do You Really Need One?
- Tripods and Stabilization Gear for Sharp, Steady Shots
- Spare Batteries and Power Management on the Go
- The Best Camera Cleaning Kit for Beginners
- Lens Filters, External Lighting, and Audio Essentials
- Camera Maintenance Best Practices for Long-Term Gear Health
- Budget vs. Professional Tiering: Where to Spend and Where to Save
- Conclusion: Building Your Kit Step by Step
- Frequently Asked Questions
Last Updated: September 20, 2026
Why the Right Camera Accessories Matter From Day One
Buying a camera body is the easy part. The accessories you pair with it decide whether you actually enjoy shooting or spend the first month fighting your own gear. This guide to the essential accessories for new camera owners breaks down what genuinely earns its place in your bag, what you can safely skip, and where the money is best spent first.
A camera without the right support gear is a camera that stays in the cupboard. The essentials fall into a few clear groups: storage, protection, stability, power, cleaning, and the extras that depend on what you shoot.
- Storage: a fast, reliable memory card
- Protection: a bag that actually fits your kit
- Stability: a tripod or stabilizer for sharp results
- Power: spare batteries and a way to charge them
- Cleaning: a kit that keeps glass and sensor clear
- Extras: filters, lighting, and audio for video
Get those six right and everything else becomes optional.
Memory Cards and Storage: SD Card Speed Classes Explained
SD card speed classes describe how fast a card can write data, and they decide whether your camera can record 4K video or burst RAW files without stalling. The class rating tells you the minimum sustained write speed the card guarantees.
The common ratings you’ll see:
- Class 10 (C10): minimum 10 MB/s. Fine for basic HD video and everyday stills.
- UHS Speed Class 1 (U1): minimum 10 MB/s.
- UHS Speed Class 3 (U3): minimum 30 MB/s. The practical floor for 4K video.
- Video Speed Class (V30, V60, V90): the number is the guaranteed write speed in MB/s, so V30 means 30 MB/s.
UHS-I vs UHS-II and What Your Camera Actually Needs
UHS-II cards have a second row of pins and can move data far faster than UHS-I. Here’s the catch most beginners miss: if your camera only has a UHS-I slot, a UHS-II card will run at UHS-I speed anyway. You pay extra for nothing.
Match the card to the camera, not to the biggest number on the box. A card like the SanDisk Extreme PRO SDXC UHS-I, with read speeds up to 200 MB/s and write speeds up to 90 MB/s, covers 4K UHD video and high-resolution stills comfortably for most new owners. Buy from a reputable seller, too. Counterfeit cards are a real problem, and a fake card is the fastest way to lose a shoot.
Camera Bags and Protective Cases: Do You Really Need One?
Yes, and sooner than you think. A camera bag is not about looking the part; it’s about surviving the day your bag gets knocked off a chair or caught in the rain. Dust, moisture, and impact are the three things that end a camera’s life early.
You don’t need a huge bag. A compact shoulder bag like the Lowepro Adventura SH 140 III holds a mirrorless body plus a spare lens, uses adjustable dividers, and has a protective base against moisture and knocks. It’s made from 84% recycled fabrics, which is a nice bonus.
What to check before buying:
- Carrying capacity: does it fit your body plus the lens you actually own?
- Padding: enough to survive a drop from waist height
- Weather resistance: at least a water-resistant base and zip
- Access: can you reach the camera without unpacking the whole bag?
A common mistake is buying a bag sized for the kit you plan to own in two years. Buy for today’s gear and upgrade later.
Tripods and Stabilization Gear for Sharp, Steady Shots
A tripod is the single cheapest upgrade to image sharpness you can make. It lets you shoot long exposures, group shots, and low-light scenes that handheld shooting simply can’t hold steady. But the tripod market is where new owners waste the most money, because the spec that matters, load capacity, is buried in the fine print.
Match Load Capacity to Your Actual Kit
Every tripod lists a maximum payload. The rule most practitioners follow is to buy a tripod rated for at least twice the combined weight of your body and heaviest lens. A typical entry-level mirrorless body with a kit lens sits around 500-700 g, so a tripod rated to 1.5-2 kg gives you a comfortable safety margin. The margin matters because a tripod loaded near its limit vibrates in wind and sags slowly during long exposures.
Head Types: Ball, Pan-and-Tilt, and Joystick
The head decides how fast you can frame a shot, and it’s the part beginners underthink.
- Ball head: one locking knob frees all axes at once. Fast for stills, awkward for smooth panning video.
- Pan-and-tilt (three-way) head: separate locks for each axis. Slower to set up, but precise for architecture and video pans.
- Joystick head: a single grip controls movement. Quick to position, popular on compact travel tripods, but less precise for fine framing.
A quick-release plate is the feature beginners undervalue most. It lets you snap the camera on and off the tripod in seconds, which means you’ll actually use the tripod instead of leaving it at home. Check that the plate uses a standard size, proprietary plates make replacing a lost one unnecessarily hard.
When a Tripod Isn’t Enough: Gimbals and Stabilizers
If you shoot video, a tripod alone won’t save you. Handheld footage without stabilization looks amateur fast, and no amount of editing fully fixes it. The two tools solve different problems:
- Gimbals use motorized axes to counteract hand movement. They’re the right tool for walking shots and smooth tracking, but they need balancing before each shoot and add bulk to your bag.
- In-body or in-lens stabilization handles small shakes but can’t smooth a walking gait.
- A monopod is the lightweight compromise for sports and events where a tripod is too slow to reposition.
Before buying a gimbal, check your camera’s maximum supported payload. Most consumer gimbals are rated for around 1 kg, which a mirrorless body plus a zoom lens can exceed. An overloaded gimbal overheats and drains its battery fast.
A Sensible Buying Order
Start with a lightweight travel tripod with a ball head and a quick-release plate. Add a gimbal only once you’re shooting video regularly and know your camera-and-lens weight. A monopod is a cheap third purchase if you shoot sport or wildlife. Skip the cheapest tripods entirely, a flimsy one that shakes in a light breeze is worse than no tripod, because it teaches you not to trust the tool.
Spare Batteries and Power Management on the Go
One battery is never enough. Lithium-ion batteries drain faster in cold weather, and mirrorless cameras in particular chew through charge when you’re using the screen and continuous autofocus. Carry at least one spare, ideally two.
Power management habits that stretch a single charge:
- Turn off Wi-Fi and Bluetooth when you’re not transferring files
- Lower screen brightness and shorten the auto-off timer
- Use the viewfinder instead of the rear screen where you can
- Charge everything the night before a shoot
Buy first-party or reputable third-party batteries rather than the cheapest listing you find. A failing battery can swell or die mid-shoot, and a swollen cell is a genuine safety concern.
The Best Camera Cleaning Kit for Beginners
The best camera cleaning kit for beginners is a small, simple set: an air blower, a microfiber cloth, a soft brush, and a lens pen. You do not need a cabinet full of chemicals. You need four tools and the discipline to use them in the right order.
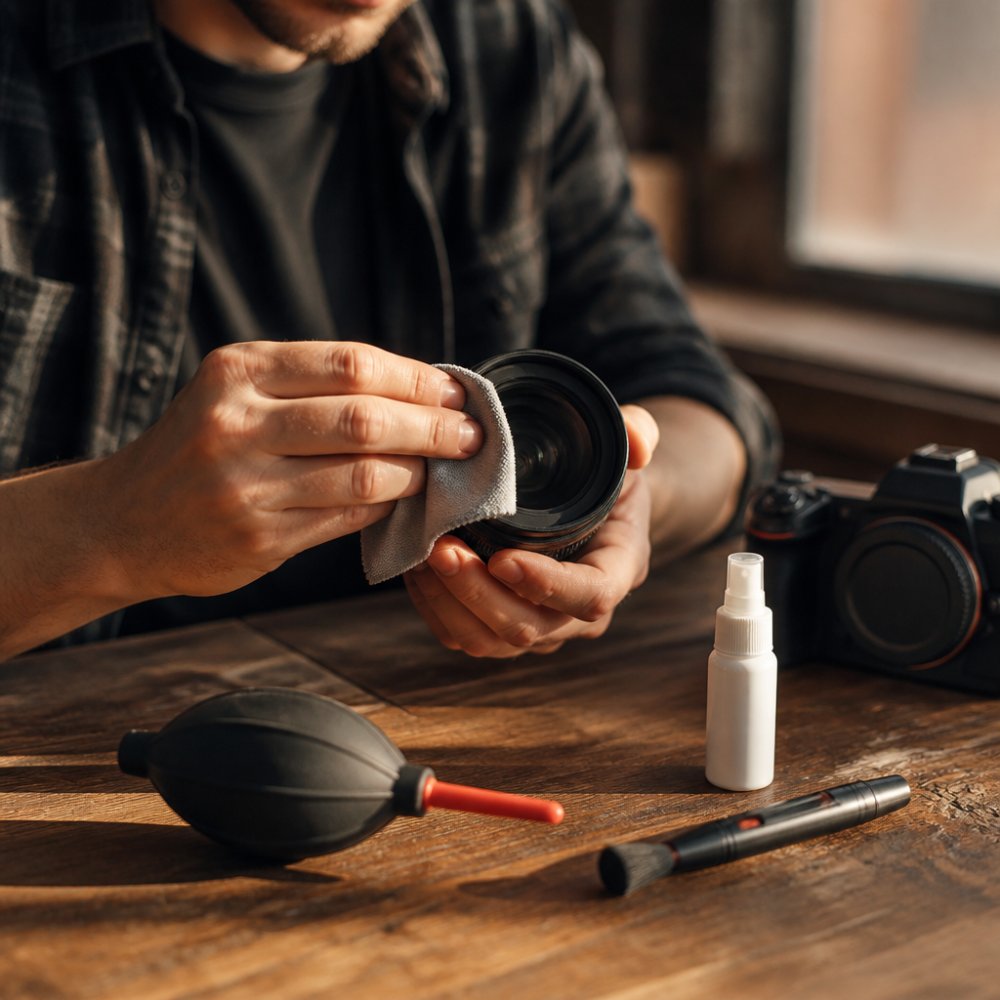
A practical beginner kit looks like this:
- Air blower: removes loose dust without touching the glass
- Soft brush: sweeps away grit the blower missed
- Microfiber cloth: lifts fingerprints and smudges
- Lens pen: the LensPen Elite uses a retractable brush and a carbon tip, with no liquid to leak in your bag
The order matters. Blow first, brush second, wipe last. If you wipe a gritty lens straight away, you grind dust into the coating.
Sensor Cleaning vs Lens Cleaning: What You Can Do Yourself
Lens cleaning is a beginner job. Sensor cleaning is not, at least not at first.
Cleaning a lens means working from the outside in with a blower, brush, and cloth. Cleaning a sensor means reaching past the lens mount to the most delicate surface in the camera. If you’re unsure, use the camera’s built-in sensor-shake function first, then have a professional handle a wet clean. A scratched sensor is an expensive lesson.
Never use canned compressed air inside the camera body. The propellant can spit onto the sensor and leave a residue that’s far harder to remove than the dust you were trying to clear.
Lens Filters, External Lighting, and Audio Essentials
Filters, lighting, and audio are the accessories that turn good photos into professional-looking ones, and they’re the easiest to overbuy. The fix is to tier each category: buy the entry-level version first, and only step up when a specific shoot demands it. Here’s how each category actually works and where the money is best spent.
Lens Filters: What Each Type Does
A filter sits in front of your lens and changes the light before it reaches the sensor. The three worth knowing:
- UV filter: blocks ultraviolet light and, more usefully, acts as cheap sacrificial glass against scratches and fingerprints. A good one is multicoated; a cheap uncoated one can add flare and soften your images.
- Polarizing filter (CPL): cuts reflections from water and glass and deepens blue skies by filtering polarized light. It costs you roughly one to two stops of light, so it’s a daylight tool. Rotate the ring to tune the effect, it’s not a set-and-forget filter.
- Neutral density (ND) filter: reduces the total light entering the lens without changing colour. A variable ND adjusts density across a range, typically 1 to 9 stops, which is useful for long exposures in bright daylight and for keeping video shutter speeds at the 180-degree rule. One caveat: at maximum density, variable NDs can produce an ‚X‘ pattern across the frame, so don’t push it to the limit. Fixed ND filters avoid the X-pattern but you need several to cover a range.
Tiering: start with one polarizer if you shoot outdoors, or one variable ND if you shoot video. Add a UV filter only if you want the protection. Skip filter stacks you won’t use.
External Lighting: Speedlights and LED Panels
On-camera flash fires straight at the subject and flattens faces. External lighting fixes that by letting you move the light off-axis or soften it.
- Speedlights are hot-shoe flashes that can tilt and swivel, so you can bounce light off a ceiling or wall for soft, natural-looking illumination. They’re the right first purchase for portraits and indoor events.
- LED panels give continuous light, which means what you see is what you get. They’re easier for beginners to learn with and double as video lights, but they’re bulkier and need their own power.
The mechanism to understand is bounce and diffusion. Bouncing spreads the light source across a large surface, which softens shadows. A small diffuser clipped over a speedlight does the same on a smaller scale. Direct, undiffused flash is the look beginners want to avoid.
Audio: The Part Beginners Ignore
Audio is the part beginners ignore until they hear their first video back. Camera microphones pick up handling noise, autofocus motor whine, and wind. The fixes, in order of cost and complexity:
- A clip-on lavalier microphone plugged into the camera is the cheapest big improvement for talking-head video.
- A shotgun microphone mounted on the camera narrows the pickup pattern toward what you’re filming, rejecting off-axis noise.
- A wireless system like the DJI Mic records clean audio at range and pairs quickly, though it’s a bigger spend than most starter gear.
If you’re only shooting stills, skip audio entirely for now. It’s the one category on this list with zero value for a photographer who never records video.
Tier every category: one polarizer or ND, one speedlight or LED panel, one lavalier mic. Buy the second item in any category only after a real shoot exposes the limitation of the first.
Camera Maintenance Best Practices for Long-Term Gear Health
Camera maintenance best practices come down to a short routine you repeat often rather than a deep clean you do once. A few minutes of care after each shoot keeps gear working for years.
- Wipe the body and lens with a microfiber cloth after every outing
- Store gear with a silica gel pack to control moisture
- Keep the body capped when no lens is attached
- Check for firmware updates every few months; they fix bugs and sometimes add features
- Never leave a battery at zero charge for long periods
- Have the sensor professionally cleaned when spots appear in your images
Treat your gear like a tool, not a trophy. It’s meant to be used, but a little routine care is the difference between a camera that lasts five years and one that lasts fifteen.
Budget vs. Professional Tiering: Where to Spend and Where to Save
Spend on the things that sit between you and a sharp, working image. Save on the things that only matter at the edges. That’s the whole rule.
| Category | Spend Here | Save Here |
|---|---|---|
| Storage | Fast, genuine U3 card | Cheapest no-name card |
| Bag | Padded, weather-resistant | Oversized fashion bag |
| Support | Stable tripod with quick-release | Flimsy budget tripod |
| Power | Reputable spare batteries | Unbranded cells |
| Cleaning | Blower, cloth, lens pen | Full chemical kits |
| Filters | One good polarizer or ND | Filter stacks you won’t use |
New owners tend to overspend on filters and lighting and underspend on storage and support. Flip that. A reliable card and a steady tripod will improve more of your photos than any filter.
Once your shooting routine settles, post-processing is where the next gains come from. Editing software and a comfortable workflow matter more than most beginners expect, and ergonomic tools like a TourBox Elite console can cut the time you spend on repetitive adjustments. That’s a later upgrade, not a day-one buy.
Conclusion: Building Your Kit Step by Step
The challenge for every new camera owner is the same: the gear list never ends, but your budget does. Build in stages. Start with a fast card, a protective bag, a spare battery, and a simple cleaning kit. Add a tripod next, then a filter, then lighting or audio once you know what you actually shoot.
Start for free and build your kit with confidence, one essential at a time.
Frequently Asked Questions
What are the essential camera accessories I need as a beginner?
Start with a fast SD card (UHS-I, U3 rated), a spare lithium-ion battery, and a basic cleaning kit with a microfiber cloth and air blower. Add a protective camera bag, a lightweight tripod for low-light shots, and a lens hood to reduce glare. These camera accessories cover storage, power, protection, and stability, which are the four areas where beginners run into problems first. You can add filters, external microphones, and ergonomic straps as your skills grow.
How do I choose the right memory card for my camera?
Check your camera manual for the recommended speed class. For 4K video or burst shooting, look for UHS Speed Class 3 (U3) cards with write speeds of at least 30 MB/s. The SanDisk Extreme PRO SDXC UHS-I, for example, offers read speeds up to 200 MB/s and write speeds up to 90 MB/s, which handles most beginner and enthusiast cameras. Buy from reputable retailers to avoid counterfeits, and format the card in-camera before first use.
What cleaning tools are essential for maintaining camera sensors?
For routine maintenance, a microfiber cloth, air blower, and a LensPen handle most dust and smudge issues on lenses and camera bodies. Sensor cleaning is more delicate: use a dedicated sensor swab and solution only when you see dust spots in your images at small apertures. If you are unsure, many camera stores offer professional sensor cleaning. Never use compressed air directly on a sensor, as it can deposit propellant residue or damage the filter stack.
Are tripod accessories necessary for landscape photography?
A tripod is one of the most valuable camera accessories for landscape work because it enables long exposure shots, sharp depth of field at small apertures, and consistent framing for panoramas. A quick-release plate and a tripod head with independent pan and tilt controls make adjustments faster. For beginners, a lightweight aluminum tripod like the Manfrotto Compact Action supports entry-level DSLR and mirrorless setups up to 1.5 kg, which covers most starter kits.