Table of Contents
- Start With Your Goal, Not the Camera
- Point-and-Shoot, SLR, or Rangefinder: Which Analog Camera Type Fits You
- Why a Film Point and Shoot Camera Is the Easiest First Step
- Manual vs Automatic Film Camera: Match the Controls to How You Want to Learn
- Film Format and Film Stock: 35mm, Medium Format, and What to Load First
- Beginner-Friendly Features That Actually Matter
- A Used Film Camera Buying Guide: Where to Shop and What to Ask
- Physical Inspection: Body, Seals, and Viewfinder
- Lens Inspection: Haze, Scratches, Fungus, and Worn Coatings
- Functional Testing: Shutter, Meter, Film Advance, and Test Shots
- Common Model-Specific Failure Points and Repairability
- What to Buy With a Film Camera: The First-Roll Setup
- Total Cost of Ownership: Film, Development, Scanning, Batteries, and Repairs
- Frequently Asked Questions
Last Updated: October 18, 2026
Start With Your Goal, Not the Camera
Most people hunting for their first analog camera start with a model name they saw in a YouTube video. That is the wrong end of the problem. We would rather you start with a blunt question: what do you actually want to do with this thing?
Buying your first analog camera works best when you treat it as a decision about a workflow, not a purchase of an object. A camera you love but cannot get processed conveniently will sit in a drawer.
Here is the throughline for this guide: the best first analog camera is the one that gets out of your way. Everything below serves that idea.
Decide your goal first (learning exposure, casual snapshots, portraits, travel), then pick the camera type that matches it. The model matters far less than the fit.
Point-and-Shoot, SLR, or Rangefinder: Which Analog Camera Type Fits You
The three main analog camera types suit three different temperaments. A point-and-shoot does the thinking for you, an SLR shows you exactly what the lens sees, and a rangefinder asks you to compose through a separate window and focus by aligning two images. None is objectively better. They fail in different ways for different people.
- Point-and-shoot: Small, fast, fully automatic. Best if you want to document life without learning exposure theory first. Weakness: limited control and often fragile electronics.
- SLR (single-lens reflex): You look through the lens via a mirror. Interchangeable lenses, full manual control, and the largest used market. Best if you want to learn photography properly. Weakness: bulk and weight.
- Rangefinder: Quiet, compact, beautiful to use. Best for street and travel work. Weakness: parallax error, higher prices, and fewer affordable options for beginners.
If you are unsure, the SLR is the safer bet for a first analog camera because it teaches you the fundamentals and the used market is deep. The point-and-shoot is the safer bet if you know you will not study the exposure triangle.
Why a Film Point and Shoot Camera Is the Easiest First Step
A film point and shoot camera removes every decision except framing and when to press the button. That sounds limiting, and it is, but it is also why so many people actually finish their first roll with one. Load the film, set the ISO dial to match the film stock, and shoot.
The catch is that these cameras were consumer electronics, and consumer electronics from the 1980s and 1990s age badly. Capacitors leak, autofocus motors seize, and the zoom mechanisms on later models are a common failure point. When looking at used listings, a point-and-shoot should be treated as a gamble unless the seller confirms it has been tested with a roll of film.
A point-and-shoot that powers on and winds is not the same as one that works. Many fail mid-roll or scratch the film. Always ask whether a test roll was shot and developed, not just whether the battery is fresh.
Buy one if you want immediacy and do not mind a shorter lifespan. Skip it if you want to learn manual exposure, because you will outgrow it in weeks.
Manual vs Automatic Film Camera: Match the Controls to How You Want to Learn
The manual vs automatic film camera decision is really a decision about how you want to learn. A fully manual camera forces you to understand shutter speed, aperture, and the exposure meter. A semi-automatic camera with aperture priority lets you set the aperture and trusts the camera for shutter speed.
A recommendation for a first analog camera is to buy a body that offers at least aperture priority, and ideally full manual as well. That combination lets you start in a forgiving mode and grow into manual control without buying a second camera.
- Fully manual: Best for learning, slowest to use, no battery dependence on many models.
- Aperture priority: The sweet spot for beginners. You control depth of field, the camera handles speed.
- Program / fully automatic: Fastest, least educational, most dependent on electronics.
The controls you cannot live without are the ones that match your temperament. If you are impatient, buy the automatic. If you are curious, buy the manual-capable body.
Film Format and Film Stock: 35mm, Medium Format, and What to Load First
Start with 35mm film. It is the most widely available format, the cheapest to process, and the format almost every beginner-friendly camera uses. Medium format (120 film) delivers gorgeous detail but costs more per frame, needs different processing, and the cameras are heavier and pricier.
For your first film stock, pick something forgiving with wide exposure latitude. A 400 ISO color negative film is the standard starting point because it handles indoor and outdoor light reasonably and hides small exposure errors. Save the slide films and high-contrast stocks for later.
- ISO 400 color negative: The default first choice. Flexible, forgiving, widely processed.
- ISO 200: Great for bright daylight and finer grain.
- ISO 800+: For low light, at the cost of grain.
Check what your local lab actually develops before you buy a niche stock. Film availability and processing access vary enormously by region, and a film you cannot get developed is a film you will not shoot.
Beginner-Friendly Features That Actually Matter
Ignore the spec sheet. A handful of features genuinely change your experience as a beginner, and the rest is marketing. The trick is to match each feature to the goal you set at the start, because a feature that is essential for one beginner is irrelevant to another.
The features that earn their place
- A working light meter: Either built-in or a separate meter. Without one, you are guessing, and guessing is how beginners ruin rolls and lose confidence. A built-in meter that reads accurately is the single most valuable feature on a first camera.
- Battery compatibility: Check which battery the camera takes and whether it is still produced. Some older cameras use mercury cells that are no longer made and need an adapter or a workaround. A camera you cannot power is a camera you cannot use.
- A bright, clean viewfinder: A dim or hazy viewfinder makes focusing miserable and hides focusing errors. This matters more than any spec-sheet number ever did.
- Mechanical shutter backup: Many manual cameras fire without a battery at one or two speeds, which is a lifesaver when a battery dies mid-trip.
- Standard lens mount: A common mount means cheap, plentiful lenses later, and a wider pool of repairers who still work on the system.
- Aperture priority (or full manual): The mode that lets you start forgiving and grow into manual control without buying a second camera.
Match the feature to your goal
Use your stated goal to decide which features are non-negotiable:
- If you want to learn exposure: Prioritize full manual control, a working meter, and a bright viewfinder. Skip automation you will not use.
- If you want casual snapshots: Prioritize a working meter, battery availability, and a compact body. Manual control is optional.
- If you want portraits: Prioritize a standard lens mount and a reliable meter, so you can add a portrait lens later without changing systems.
- If you want travel and street work: Prioritize size, quiet operation, and battery life over interchangeable lenses.
What does not matter much for a beginner
Motor drives, multiple exposure modes, exotic accessories, and collector-grade cosmetics add cost and complexity without improving your first rolls. A camera that is slightly boring but reliable will teach you more in six months than a collector’s piece ever will.
Buy the features that serve your goal, not the features that impress a forum. A working meter, a clean viewfinder, and a battery you can still buy will carry you further than any spec-sheet bragging right.
A Used Film Camera Buying Guide: Where to Shop and What to Ask
This used film camera buying guide section is the part most buyers skip, and it is where the money is won or lost. Buy from sellers who specialize in used gear, offer a return window, and describe condition honestly. Avoid anonymous marketplace listings with one blurry photo and no return policy, no matter how tempting the price.
When you contact an online seller, ask these questions in writing:
- Has the camera been tested with a roll of film, and can you share the results?
- Does the shutter fire at every speed, including the slow ones?
- Does the light meter respond accurately?
- Are the light seals intact or replaced?
- Is there any fungus, haze, or separation in the lens?
- What is the return policy if the camera arrives faulty?
A seller who answers these clearly is worth a higher price than one who dodges them. That is the whole game.
Physical Inspection: Body, Seals, and Viewfinder
When the camera is in your hands, inspect it in this order: body, seals, viewfinder. Run your fingers along the seams and open the film door to check the foam light seals. Perished seals cause light leaks that show up as streaks on your negatives, and replacing them is a fiddly job you would rather not do on day one.
Look through the viewfinder against a bright wall. Dust and haze are common and often cleanable, but a dim or cloudy viewfinder can mean internal fogging that needs a technician. Check the film advance lever or crank for smooth operation, and listen to the shutter at slow speeds. A sluggish slow speed is an early sign the mechanism needs a clean, lube, and adjust service.
Bring a small torch to any in-person inspection. Shining it through the lens and into the viewfinder reveals haze, dust, and fungus that are invisible in normal light.
Lens Inspection: Haze, Scratches, Fungus, and Worn Coatings
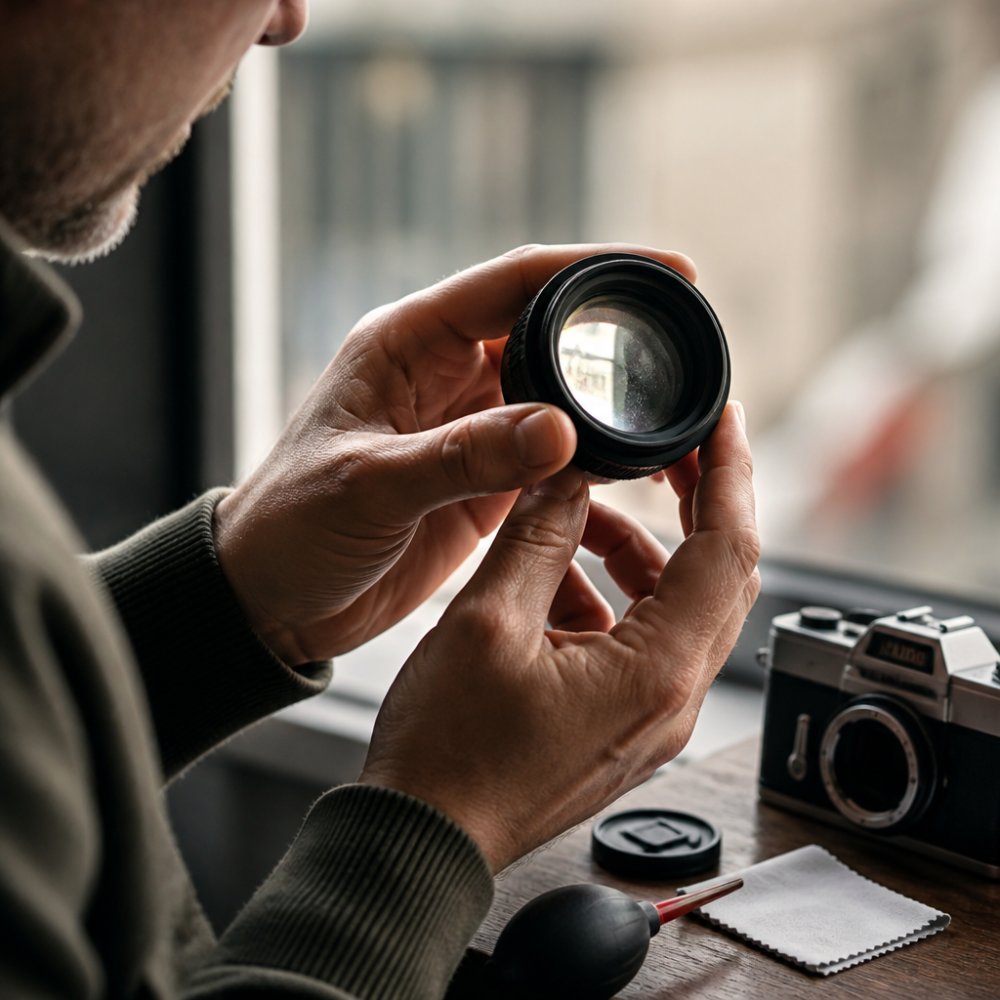
Shine a light through the lens from both ends and look for four things: haze, scratches, fungus, and worn coatings. Haze is a milky film inside the glass that softens contrast.
A little internal dust is normal and rarely affects images. Fungus is not normal and spreads.
Check the aperture blades too. Open and close the aperture and watch for oil on the blades or sluggish movement. Sticky blades cause inconsistent exposures, and that is a repair, not a quirk.
Functional Testing: Shutter, Meter, Film Advance, and Test Shots
Functional testing is where you separate a working camera from a display piece. Fire the shutter at every speed and listen for consistency. Test the exposure meter against a known-good meter or a phone app. Advance the film lever and confirm the frame counter moves. Open the back and watch the shutter curtains or blades open and close.
Then shoot a test roll. This is the single most important step, and it is the one buyers skip because it costs a little money and a little patience. A test roll confirms the shutter, the meter, the film advance, and the light seals all at once. Shoot a few frames at different speeds and apertures, get it developed, and look for uneven exposure, light leaks, and scratches.
Skipping the test roll is how people discover a light leak three months later, after ruining a holiday’s worth of photos. Budget for one test roll before you trust the camera with anything important.
Common Model-Specific Failure Points and Repairability
Every family of analog cameras has its known weak spots. Electronics-heavy point-and-shoots often fail at the capacitor or the zoom motor and are frequently unrepairable because parts no longer exist. Mechanical SLRs are more repairable but need periodic servicing, and the clean, lube, and adjust service is the standard fix for a stiff or inaccurate mechanism.
Repairability should influence what you buy. A mechanical camera with a common lens mount and a technician who still services it is a better long-term bet than a rare electronic model with no parts supply.
Ask before you buy: is this model still serviced, and are parts available? A seller who does not know is telling you something.
What to Buy With a Film Camera: The First-Roll Setup
Deciding what to buy with a film camera is as important as the camera itself. Here is a first-roll setup to consider:
- The camera body, tested with a roll
- One standard lens (a 50mm or a 35-70mm zoom covers most situations)
- Two rolls of ISO 400 color negative film
- Spare batteries in the correct type
- A lens cloth and a blower
- A simple strap
- A plan for where to get the film developed
That is it. Resist the urge to buy a bag full of accessories before you have shot your first roll. The lens and the film are what make pictures. Everything else is optional.
Total Cost of Ownership: Film, Development, Scanning, Batteries, and Repairs
The purchase price is only the entry fee. A first analog camera carries ongoing costs that surprise people, and budgeting for them honestly is the difference between a hobby you keep and one you abandon. Most beginners underestimate the recurring side by a wide margin because they compare the camera to a digital body and stop there.
Here is a cost structure to consider, with the levers that actually move the number.
The one-time costs
- Camera body and lens: The single largest outlay, but also the most negotiable. A tested mechanical SLR with a standard 50mm lens is the value sweet spot; a collector-grade body or a cult point-and-shoot commands a premium for cosmetics and hype, not image quality.
- First-roll accessories: A strap, a blower, a lens cloth, and spare batteries in the correct type. Keep this minimal, a bag full of accessories before your first roll is money that should have gone to film.
- A test roll and its processing: Treat this as part of the purchase price, not an optional extra. It is the only way to confirm the camera works before you trust it with anything important.
The recurring costs
Film, development, and scanning are the costs that scale with how much you shoot, and they are where budgets quietly break.
- Film stock: Priced per roll, and the spread between a basic ISO 400 color negative and a premium or slide stock is significant. Beginners should stay on the forgiving, widely available end of the range.
- Development: Priced per roll at a lab. Black-and-white and color negative are the common, affordable paths; slide film and push processing cost more and are handled by fewer labs.
- Scanning: Either priced per roll at the lab or absorbed into the cost of a home scanner. Lab scans are the sane default until you know you will shoot consistently; a scanner only pays for itself across a large volume of rolls.
- Batteries: Cheap per cell but easy to forget, and a dead meter mid-trip is annoying. Check the battery type before you buy and keep a spare.
- Servicing and repairs: The wildcard. A light-seal replacement is minor, a shutter service is more involved, and an unrepairable electronic fault can write off the whole camera. Mechanical bodies with common mounts are the cheaper long-term bet.
How to budget without guessing
Because lab prices vary by region and change over time, a single figure cannot be quoted. Instead, use this method:
- Price one roll end-to-end. Add the film cost, the development cost, and the scanning cost for a single roll at your chosen lab. That is your true per-roll number.
- Decide your monthly roll count. Be honest about how often you will actually shoot. A modest, sustainable habit beats an expensive camera you are afraid to use.
- Multiply and set the budget. Per-roll cost times monthly rolls is your recurring budget. Add a small reserve for batteries and the occasional service.
- Confirm current lab prices directly. Ask the lab before you commit to a stock or a format, because a film you cannot get developed affordably is a film you will not shoot.
A roll you shoot and never develop is money wasted. Factor processing into every roll you buy, and never buy film faster than you can afford to develop it.
It is advisable to set a monthly budget for film and processing before you buy the camera, and let that budget decide how often you shoot. The camera is a one-time decision; the film habit is the one that determines whether analog photography sticks.
Frequently Asked Questions
What should I look for when buying my first analog camera?
Start with the lens and shutter, because those decide whether the camera can take a clean photo. Shine a light through the lens to check for haze, scratches, and fungus. Fire the shutter at each speed and listen for a consistent, snappy sound. Confirm the film advance works and the light seals are intact. Then check battery compatibility and whether the meter responds. A cosmetically worn body with a clean lens beats a shiny body with a cloudy lens every time.
Is a point-and-shoot or an SLR better for a beginner?
A film point and shoot camera is easier to carry and faster to use, so it suits casual shooting and street photography. An SLR lets you change lenses and see through the actual lens, which helps you learn aperture, shutter speed, and focus. If you want to learn exposure, pick an SLR with a working meter and a 50mm lens. If you want to shoot without thinking about settings, pick a point and shoot with a reliable meter and autofocus.
How can I tell if a used film camera is working properly?
Run a functional test before you pay. Fire the shutter at every speed and check that the slow speeds sound slower than the fast ones. Advance the film lever and confirm the sprocket teeth turn. Open the back and look for light leaks around the seals. Test the meter against a known light source. Ask for test shots from a recent roll, and shoot one roll yourself as soon as you get the camera home.
Should I buy a 35mm or medium-format film camera?
Buy 35mm first. Film stock is widely available, processing is cheaper, and a 35mm camera is lighter and easier to carry. Medium format gives you larger negatives and more detail, but the cameras cost more, the film costs more per frame, and the workflow is slower. Once you know how you shoot and what you like, moving to medium format is a deliberate choice rather than a guess.
What else do I need to start shooting film?
Budget for film stock, development, and scanning, not just the camera. You also need the right batteries, a lens cloth, and a way to store negatives. If you plan to scan at home, add a scanner or a scanning service to your budget. Check local processing options or mail-in labs before you buy, because film availability and processing access vary by location. A first-roll setup should include two rolls of film so you can test the camera twice.
Is it better to buy a film camera with manual or automatic controls?
Manual controls teach you exposure, and a semi-automatic mode such as aperture priority gives you a safety net while you learn. Fully automatic cameras are faster but hide the settings, which slows your learning. If you want to understand light, choose a camera with manual exposure and a working meter. If you want convenience, choose automatic. Many beginners do best with a camera that offers both.
The hardest part of buying a first analog camera is not finding one. It is knowing whether it will actually work when it arrives, and whether you will enjoy using it. That uncertainty is exactly what we want to remove. Kameratalk is built to help you research gear, compare options, and learn from a community of people who shoot film every day, so you can buy with confidence instead of guesswork. Start for free and get the guidance you need before you spend a cent on a camera.