
Last Updated: November 15, 2026
Quick Summary
To check if a film camera works, dry-fire it through every shutter speed with the back open and watch the curtains, then test bulb mode, the film transport, rewind, light seals and meter. A test roll is the only way to confirm the whole chain works.
- Inspect the body for dents, rust and cracks, and shine light through the lens for scratches, haze or fungus.
- Fire the shutter at every speed and watch the curtain gap change through the open back.
- In bulb mode the shutter should stay open until you release the button.
- Load a sacrificial roll to verify loading, advance and rewind before shooting good film.
- Crumbly black light seals around the film door mean the seals need replacing.
Table of Contents
- Start With the Camera Body and Lens
- How to Test a Film Camera Without Film
- How to Check a Film Camera Shutter
- How to Test a Film Camera Light Meter
- Test the Film Transport and Rewind
- Check the Viewfinder, Mirror and Light Seals
- Used Film Camera Inspection Checklist
- Common Mechanical Problems and What They Mean
- Bring Your Camera to Kameratalk for a Final Check
- Frequently Asked Questions
Start With the Camera Body and Lens
Learning how to check if a film camera works starts with your eyes, not a battery. Before you spend a cent, inspect the body and lens closely, because cosmetic clues often reveal mechanical neglect. Skipping this step often leads to costly surprises later.
Run your fingers along the body. Look for dents, cracks, and rust around the screws. A dented filter ring usually means the camera took a fall.
Open the film door and check the pressure plate for scratches. Then look at the lens from both ends.
- Front element: hold it to the light and check for deep scratches
- Inside the lens: look for haze, dust, or spider-web patterns that signal fungus
- Aperture blades: they should be dry, not oily
- Focus ring: it should turn smoothly, not grind
A common mistake is buying a camera with a cloudy lens because the body looked clean. Fungus spreads and can etch the glass for good (Lens fungus). For safe cleaning guidance on the glass you’re inspecting, see how to clean vintage camera lens glass without damage.
If you’re new to film entirely, our guide on buying your first analog camera walks through the whole decision. And when you’re ready to judge the lens properly, this used lens buyer’s guide covers what to test beyond the glass.
How to Test a Film Camera Without Film
You can test most of a film camera’s mechanics without loading a single frame. Dry-firing the camera, which means cocking and releasing the shutter with no film inside, reveals how the mechanisms behave. It won’t prove accurate exposure, but it catches the big faults before money changes hands.
Here’s how to test a film camera without film, step by step:
- Set the shutter speed dial to different settings and fire the shutter each time
- Watch and listen: slow speeds should sound slower than fast ones
- Open the back and watch the shutter curtains travel across the film gate
- Cock the wind lever and confirm it advances with a firm, even feel
- Press the shutter release and check it returns cleanly
- Try every dial and switch to confirm nothing is stuck
A camera that fires at one speed only, or where the wind lever jams, needs repair. That’s your cue to walk away or negotiate hard.
How to Check a Film Camera Shutter
The best way to check a film camera shutter is to fire it at every speed and watch the curtains through the open back. A healthy shutter opens and closes crisply at each setting. A tired one hangs open at slow speeds or barely opens at fast ones.
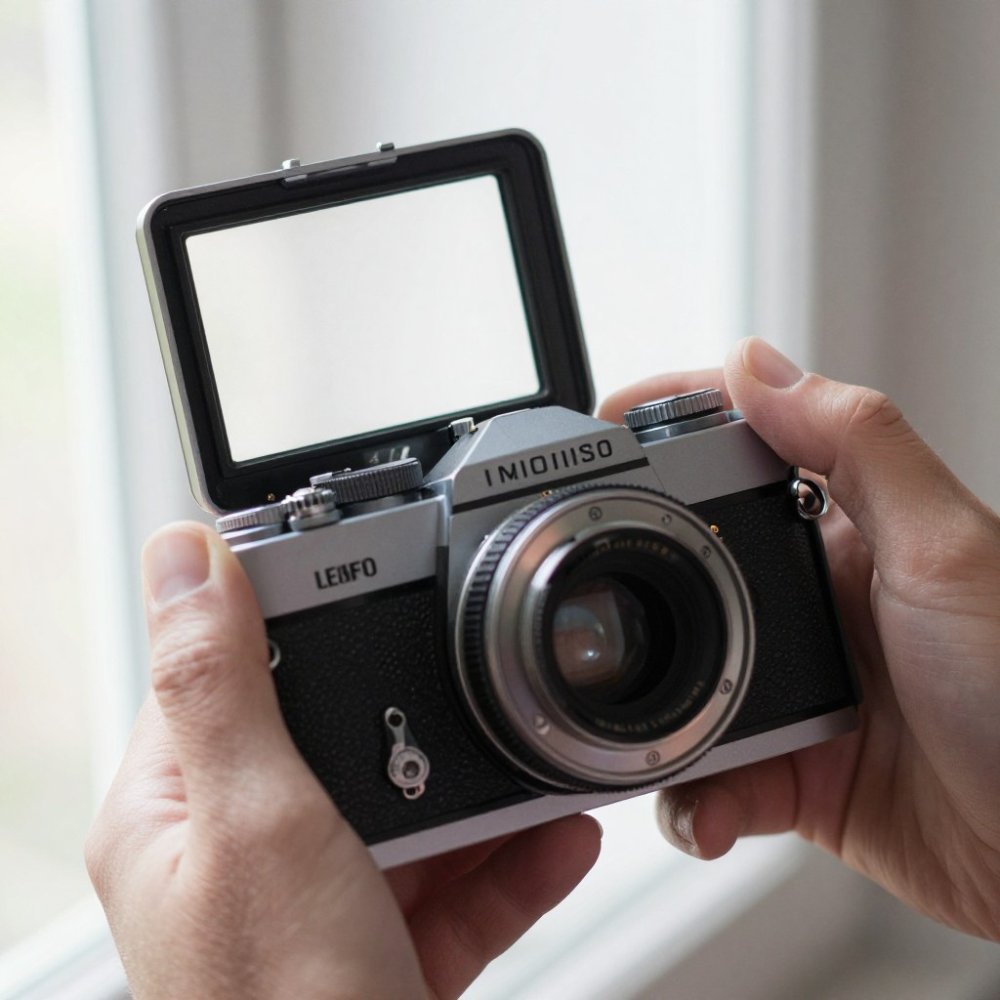
Point the camera at a bright window while the back is open. Fire at one second, then half, then a quarter. You should see the gap between the curtains change. At fast speeds the gap narrows to a slit. On a vertically travelling metal shutter the slit moves top to bottom; on a horizontal cloth shutter it crosses left to right. Note which direction yours travels so you can tell a lazy curtain from a normal one.
Now test bulb mode. Press the release and hold it. The shutter should stay open until you let go. If it snaps shut early, the mechanism is worn. On mechanical cameras, also try the self-timer if fitted: it should run for roughly eight to ten seconds and release the shutter at the end without stalling.
Testing shutter speeds by eye is rough, though. What your ear hears as „fast“ and „slow“ cannot confirm calibration, and a shutter that sounds crisp can still be a stop off at 1/500. Treat the visual test as a pass/fail screen for gross faults, not proof of accuracy. To verify accuracy with hands-on methods, our guide on 7 ways to test a used camera’s shutter speed goes deeper.
How you test depends on the camera type, and this is where a generic checklist lets you down:
- SLRs: open the back, fire through the speed range, and watch the mirror return before the next frame. A mirror that stays up means the return spring or linkage is failing.
- Rangefinders: the shutter is often a cloth focal-plane type behind a blind; check the blind for pinholes by holding the camera to a bright light with the lens off.
- Point-and-shoots: most have electronically timed shutters you cannot watch. Fire at each speed and listen for consistency; a shutter that fires at only one speed regardless of setting points to a failed circuit.
- Fully mechanical cameras: these are the most testable by eye, but also the most likely to have drifted after decades without service. Slow speeds below 1/15 are the first to hang.
Watch out: never force the speed dial past a marked setting on a mechanical camera, many require the shutter to be cocked before the dial will turn, and forcing it can shear the timing cam.
How to Test a Film Camera Light Meter
To test a film camera light meter, compare its reading against a known-good source. Many older cameras use a battery the meter depends on, so check the battery compartment first. Look for corrosion on the contacts and confirm the correct battery type is fitted.
A simple field test works well. Point the camera and a phone light-meter app at the same scene. If the readings differ by a stop or more, the meter is suspect.
- No needle movement: the meter is dead or the battery is flat
- Needle pinned at one end: the circuit is faulty
- Readings swing wildly: dirty contacts or a failing cell
On mechanical cameras, a dead meter isn’t fatal. You can shoot with an external meter or sunny-16 rules. On electronic cameras, a dead meter often means a dead camera.
Test the Film Transport and Rewind
The film transport is the heart of any analog camera, and it’s where cheap buys fail. Cock the wind lever slowly and feel for smooth resistance. It should advance with a steady click, not a crunch.
Open the back and watch the take-up spool turn as you wind. If it doesn’t rotate, your film won’t advance and you’ll get blank rolls. On many cameras the spool only turns once the back is closed and the counter engages, so repeat the check with a sacrificial roll loaded before you condemn the transport.
Next, test the rewind crank. It should turn freely with the release button pressed. A stiff crank or a button that won’t engage points to a jammed mechanism. On cameras with a folding crank, check that it folds flat and springs back out.
How to test without wasting a full roll. You do not need usable film to prove the transport works. A blank or expired test roll is the standard approach:
- Load a sacrificial roll, expired stock, a blank leader, or a roll you don’t mind losing.
- Wind two or three frames and watch the rewind crank. It should turn as you wind; if it stays still, the film is not engaged on the take-up spool.
- Open the back in dim light and confirm the film has advanced past the gate and is sitting flat against the pressure plate.
- Close the back, fire a few frames, then press the rewind release and turn the crank. You should feel tension as the film comes back.
- Open the back and check the film has rewound cleanly into the canister without creasing or tearing.
That sequence verifies loading, advance, and rewind before you commit a single frame of good film. It also catches the most common beginner failure: film that never engaged the take-up spool and produced a blank roll.
Watch out: forcing a stuck wind lever can snap internal gears, and that turns a small repair into a write-off. If it resists, stop. The same applies to the rewind crank, if it will not turn with the release pressed, do not muscle it.
Once the dry transport test passes, the only way to confirm the whole chain is a first-roll verification. Load a cheap roll, shoot a range of speeds and apertures, and note each frame. When the negatives come back, inspect them for blank frames, uneven spacing, light leaks along the edges, and frames that overlap, each points to a specific transport or seal fault rather than a vague „camera problem.“
Check the Viewfinder, Mirror and Light Seals
A clear viewfinder tells you a lot about how a camera was stored. Look through it and check for dust, haze, or a dim, yellowed image. On SLRs, the mirror should drop back down cleanly after each shot.
Light seals are the quiet killer of old cameras. These foam strips around the film door perish with age and cause light leaks that fog your photos (Light leak). Open the door and inspect the channels.
- Crumbly black foam means the seals need replacing
- Sticky residue smears onto film and negatives
- Missing seals guarantee light leaks
Seals are cheap to replace and easy to spot. Don’t let a seller tell you otherwise. While you’re at the optics, learn the signs of fungus in vintage camera lenses so you can catch lens problems during the same inspection.
Used Film Camera Inspection Checklist
Here’s a used film camera inspection checklist you can carry to any viewing. Work through it in order and score each item pass or fail. Any fail is a negotiation point or a reason to walk.
| Check | What to Do | Pass Looks Like |
|---|---|---|
| Body | Look for dents, rust, cracks | Clean, straight panels |
| Lens glass | Shine light through both ends | No scratches, haze, or fungus |
| Aperture | Open and close through the range | Dry, snappy blades |
| Focus ring | Turn from near to far | Smooth, no grinding |
| Shutter | Fire at every speed | Crisp open and close |
| Bulb mode | Hold the release open | Stays open until released |
| Film transport | Wind and watch the spool | Advances evenly |
| Rewind | Turn the crank with release pressed | Turns freely |
| Light seals | Inspect door channels | Intact, not crumbly |
| Viewfinder | Look through and check clarity | Bright and clear |
| Light meter | Compare against a phone app | Close readings |
Print it, tick it off, and you’ll avoid most bad buys.
Common Mechanical Problems and What They Mean
Some faults are cheap fixes. Others are deal-breakers. Knowing the difference saves you from a money pit.
- Sticky shutter at slow speeds: often just needs a service, but can mean worn springs
- Dead light meter: a battery or contact issue on mechanical bodies, a serious fault on electronic ones
- Crunchy focus ring: dried grease, usually fixable
- Jammed wind lever: internal gear damage, expensive
- Crumbly light seals: cheap and easy to replace
- Fungus in the lens: can be cleaned early, but etching is permanent
Here’s the repair-versus-return call. If the fault is cosmetic or a seal, buy with a discount. If it’s the shutter, transport, or electronics, walk unless the price reflects a full service. Old equipment also deserves careful handling: don’t force dials, and keep dusty bodies away from your lungs.
Bring Your Camera to Kameratalk for a Final Check
You’ve done the dry tests, but only a test roll proves the camera truly works. Load a cheap roll, shoot a range of speeds and apertures, and note each frame. When the negatives come back, compare your notes to the results. That’s how you confirm accurate exposure, not just mechanical movement.
Buying used film gear shouldn’t feel like a gamble. Kameratalk gives you the checklists, the community, and the guidance to inspect any camera with confidence. Start for free and make your next purchase a sure thing.
Frequently Asked Questions
How can you tell if a film camera is working without using a roll of film?
You can check most of a film camera’s mechanical functions without film. Open the back and fire the shutter at each speed to watch the blades or curtains move. Turn the wind lever and confirm the frame counter advances, then test the rewind crank. Check the lens for haze, fungus and smooth focus travel, and press the battery check button if one is fitted. These steps confirm the camera is mechanically sound, but only a test roll proves the shutter speeds and light meter are accurate.
How do you test a film camera’s film advance and rewind?
Open the film door and turn the wind lever or advance wheel one full stroke. The sprocket teeth should rotate and the frame counter should move by one. Repeat several times to confirm the mechanism does not jam or slip. Then press the rewind release button and turn the rewind crank; the sprocket should rotate in reverse. If the lever feels stiff, grinds, or the counter does not move, the transport needs service before you load film.
How can you check whether a film camera’s light meter works?
Fit a fresh battery of the correct type, then point the camera at a bright scene and a dark scene while watching the meter needle or LED display. The reading should change clearly between the two. Compare the suggested exposure with a phone light meter app or a separate meter; a difference of one stop or less is acceptable for most used cameras. If the meter stays still or the battery check fails, the meter circuit needs repair.
What should you check before buying a used film camera?
Work through a used film camera inspection checklist: fire the shutter at every speed, test bulb mode, advance and rewind the film transport, check the lens for scratches, haze and fungus, inspect the light seals for crumbling foam, and confirm the battery compartment is clean. Ask whether a test roll has been shot recently. If the seller cannot confirm the shutter speeds or meter are accurate, budget for a service or negotiate the price down before you commit.