
Last Updated: November 14, 2026
Quick Summary
The essential camera maintenance tools for beginners are a rubber blower, soft brush, microfiber cloths, cotton swabs, lens cleaning solution, a precision screwdriver set, tweezers and a filter wrench. These cover routine care such as removing dust, cleaning glass and tightening loose screws. Start with cleaning tools and add repair tools only when you need them.
- Use a rubber blower first, since wiping a dusty surface can scratch the glass.
- Apply lens cleaning fluid to the cloth, never spray it directly onto the glass.
- Match screwdriver heads to the screws to avoid stripping them, and test the fit dry.
- Leave internal repair work such as opening bodies to a specialist technician.
- On film cameras, blow the film path and inspect light seals before loading film.
Table of Contents
- Why Beginners Need a Small, Focused Tool Kit
- 1. Blower and Soft Brush for Dust Removal
- 2. Microfiber Cloths and Cotton Swabs
- 3. Lens Cleaning Solution and Safe Application
- 4. Precision Screwdriver Set (JIS and Phillips)
- 5. Precision Tweezers and Small-Part Handling
- 6. Lens Spanner and Filter Wrench
- 7. Pliers, Spudger and Opening Picks
- Film Camera Cleaning and Maintenance: What Changes
- Building a Beginner Kit and Keeping a Maintenance Checklist
- Frequently Asked Questions
Why Beginners Need a Small, Focused Tool Kit
Most camera owners do not need a workshop. They need a handful of reliable tools for the jobs they will actually do: removing dust, cleaning glass, and occasionally tightening a loose screw. That is the core idea behind this list of 9 essential camera maintenance tools for beginners, the everyday camera maintenance tools that cover routine care.
Buying a large repair set on day one is a common mistake. Those kits are built for technicians working on dead cameras, and most of their contents will sit in a drawer. A small, focused kit covers routine care and leaves the advanced repair work to a specialist.
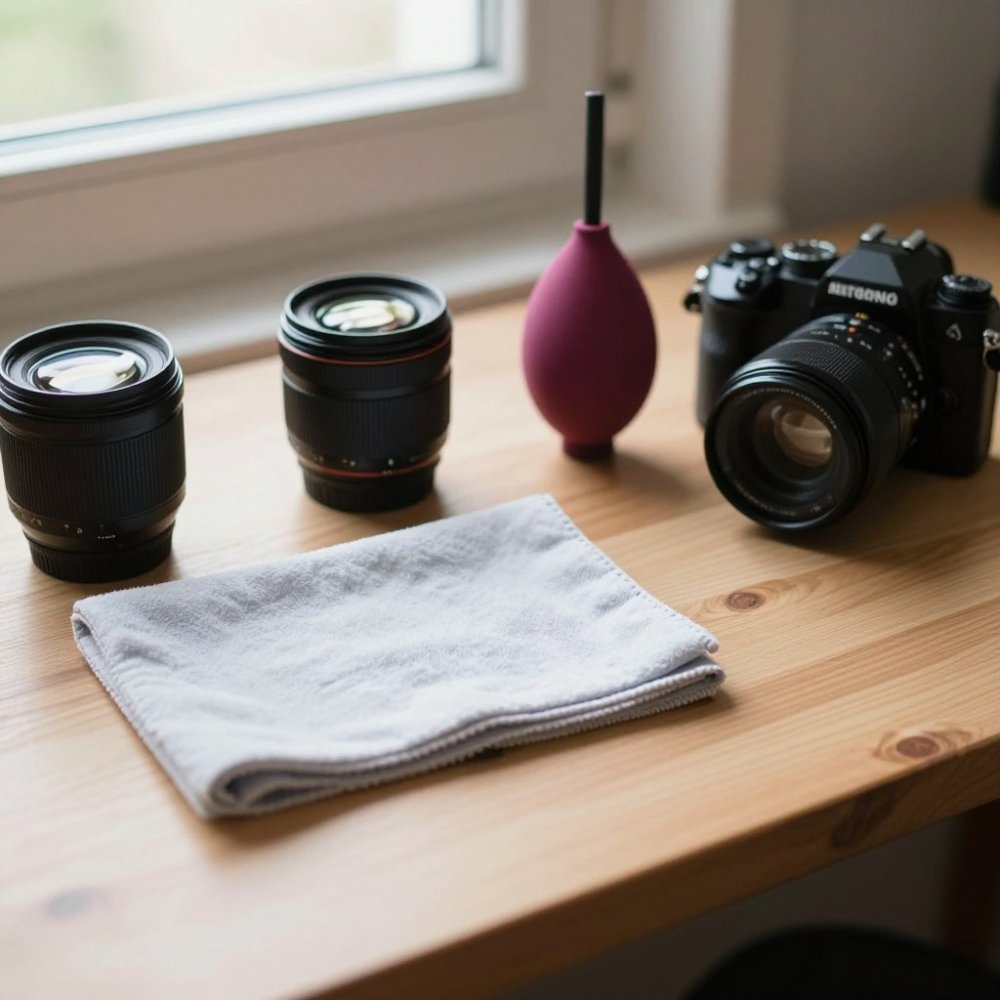
!Photographer’s desk with a neatly arranged set of cleaning tools, a lens cloth and a blower beside a film camera body in warm natural light
Maintenance means keeping a camera clean and working between uses. Repair means opening a body or lens and replacing parts. Beginners should start with maintenance, because it prevents most damage and carries almost no risk.
1. Blower and Soft Brush for Dust Removal
A rubber blower is the safest first tool you can buy. It moves loose dust off the sensor area, lens glass, and body crevices without touching anything. Use it before any cloth or liquid, because wiping a dusty surface drags grit across the glass and can leave fine scratches.
Pair the blower with a soft, dry brush for stubborn debris in grooves and around dials. Keep the nozzle pointed downward so particles fall away from the camera rather than settling deeper inside. Avoid compressed air cans on sensors, since the propellant can leave residue.
Watch out: never insert the blower tip into a lens mount or body opening where it can push dust further in.
2. Microfiber Cloths and Cotton Swabs
Microfiber cloths are a basic maintenance item, and a lint-free one can handle most exterior wiping. Keep a clean cloth reserved for optics only, and store it in a sealed bag so it does not collect dirt from your bag or pockets.
Cotton swabs are useful for the edges of lens elements and the rims of filter threads, where a cloth cannot reach. Use one swab per pass and discard it after each use. Reusing a swab simply spreads the grime you just removed.
3. Lens Cleaning Solution and Safe Application
Lens cleaning fluid should be applied to the cloth, never sprayed directly onto the glass. Liquid running into a lens barrel can seep behind elements and be difficult to remove. A few drops on the cloth is enough.
Work in gentle circles from the centre outward, then lift the cloth without dragging it. Lens coatings are delicate, and abrasive wiping or harsh solvents such as household glass cleaners can damage them. Use only solutions labelled safe for camera optics.
For a deeper walkthrough on handling delicate glass, see our guide to cleaning vintage camera lens glass without damage. It covers which solvents to avoid and how to check the coating after cleaning.
4. Precision Screwdriver Set (JIS and Phillips)
Camera bodies and lenses use small screws that are easy to strip, and the single most common beginner mistake is grabbing a driver that almost fits. A precision screwdriver set with correctly sized JIS and Phillips heads matches the fasteners on most Japanese-made equipment, while a cheap generic driver will cam out and chew the screw head.
Identify the head shape under good light before you turn anything.
Sizing is the other half of the job. Choose a set with several sizes rather than a single bit, and test the fit dry before applying force. A driver that rocks in the slot is the wrong size. If a screw resists, stop and confirm the correct size instead of turning harder, because a stripped head turns a two-minute job into a repair.
Watch out: never use a driver that is one size too small to „make it fit“, that is the fastest way to strip a screw head and scar the surrounding finish.
5. Precision Tweezers and Small-Part Handling
Tweezers help you grip tiny screws, retaining clips, and loose debris without touching delicate surfaces with your fingers. Fingers leave oils that attract dust, and they lack the control needed for small parts.
Look for non-magnetic tweezers with fine, aligned tips. Magnetic tweezers can disturb internal mechanisms, which matters inside a camera. Store the tweezers in a case so the tips stay straight.
6. Lens Spanner and Filter Wrench
Filters and lens rings are often fitted tightly, and a lens spanner or filter wrench gives an even grip without marring the metal. Forcing a filter with bare hands can warp the threads, while a proper tool applies torque evenly around the ring.
Match the tool to the ring size. A spanner that is too large will not engage, and one that is too small will slip. Many beginners own a spanner that fits only one lens, so check which diameters you need before buying a set.
Watch out: a filter stuck from over-tightening should be loosened gently with the correct tool. Hammering or prying can crack the glass or bend the mount.
7. Pliers, Spudger and Opening Picks
Pliers, a spudger, and opening picks are the tools for repair rather than routine care. A spudger is a plastic or nylon pry tool that separates clips and panels without scratching the finish. Opening picks serve a similar role on small covers.
These tools belong in a beginner kit only if you plan to open equipment yourself. For most owners, the sensible approach is to leave internal work to a repair technician and use these tools only on items you are prepared to lose. Basic disassembly on a camera you rely on carries real risk, and the damage is often expensive to fix.
Film Camera Cleaning and Maintenance: What Changes
Film cameras need a slightly different routine from digital ones, and the difference is mostly about where dust and light leaks do damage. Film bodies have no sensor to clean, so attention shifts to the film gate, the pressure plate, the take-up spool area, and the light seals around the back door. Dust trapped in these areas can scratch negatives, so a blower and soft brush matter more on film gear than on a digital body.
Work through the film path in order. Open the back in a clean, still room, blow loose dust from the gate and pressure plate, then brush the rails with a dry soft brush. Never touch the shutter curtains or the mirror with a cloth, a blower only. Check the felt light seals along the door channels; healthy seals look plush and matte, while failing ones look flaked, sticky, or crumbly. Light seals that have degraded let light fog film, and replacement is a repair task best left to a specialist unless you are comfortable cutting and fitting new foam.
Know where maintenance stops and repair begins. Cleaning the film path, brushing the body, and inspecting seals are beginner-safe. Replacing light seals, adjusting the shutter, recalibrating the meter, and cleaning the mirror box are specialist work. A common pattern is for beginners to attempt a seal replacement, misalign the door, and introduce a light leak worse than the one they started with.
Frequency matters as much as method. Blow the film path before every roll, brush the rails when you change film in a dusty environment, and inspect seals each time you open the back. Store film cameras with the shutter uncocked and the lens removed in humid conditions, and keep a silica pack in the bag to limit fungus growth on glass.
Digital owners should also keep the sensor in mind. Dust on the sensor shows up as dark spots in images, and cleaning it demands more care than cleaning a lens. Keep sensor work to a minimum and follow manufacturer guidance, and treat wet sensor cleaning as specialist work until you have practised on a body you can afford to lose.
For a related check, see how to spot fungus in vintage camera lenses early. Fungus grows in humid storage and can etch lens coatings, so catching it early saves the glass.
Building a Beginner Kit and Keeping a Maintenance Checklist
Start with the items that protect your gear most often: a blower, microfiber cloths, cotton swabs, and lens cleaning fluid. Add a precision screwdriver set and a filter wrench when you own the matching lenses. Hold off on repair tools until you have a clear reason to use them.
A simple maintenance checklist keeps the routine consistent:
- Blow loose dust from the body, lens, and sensor area before every session
- Wipe lens glass with a dry microfiber cloth after each outing
- Clean filter rims and lens edges with a swab when visibly dirty
- Check screws and filter rings for looseness monthly
- Inspect light seals on film cameras before loading film
- Store the kit and cameras in a dry, sealed bag to limit humidity
When you buy used gear, check the shutter before you trust the camera. Our walkthrough on how to check shutter count on used cameras explains where to find the number and what it means. For a wider view of what a new owner should carry, see essential accessories for new camera owners, and for context on how sensor size affects care, see understanding camera sensor size for beginners.
Above all, keep the kit small and use it consistently. A few well-chosen tools, used with care, will do more for your camera than a drawer full of tools you never touch.
The table below summarises the core beginner kit and what each item is used for.
| Item | Best for | Key note |
|---|---|---|
| Rubber blower | Loose dust on sensor, lens and body | Use before any cloth or liquid |
| Soft brush | Debris in grooves and around dials | Keep nozzle pointed downward |
| Microfiber cloth | Exterior wiping and lens glass | Keep one reserved for optics only |
| Cotton swabs | Lens edges and filter rims | Use one swab per pass, then discard |
| Lens cleaning solution | Smudges on glass | Apply to cloth, never spray on glass |
| Precision screwdriver set | JIS and Phillips screws | Match head size; avoid driver that rocks |
| Tweezers | Tiny screws, clips and debris | Choose non-magnetic with fine tips |
| Filter wrench | Tight filters and lens rings | Match tool size to ring diameter |
Frequently Asked Questions
What tools do beginners need to clean a camera?
A basic camera maintenance tool set covers three jobs: removing dust, cleaning glass, and loosening small parts. Start with a rubber air blower, a soft brush, microfiber cloths and cotton swabs. These handle most exterior and lens-surface cleaning without risk. Add a precision screwdriver set and tweezers only when you plan to open a body or lens, and check the screw type before buying so you do not strip the head.
How do you clean a camera lens safely?
Blow loose dust off first, because wiping a gritty lens scratches the coating. Apply a small amount of lens cleaning solution to a microfiber cloth, not directly to the glass, and wipe in a circular motion from the centre outward. Use a fresh swab for spots that remain. Never use household glass cleaner, paper towels or your shirt, as these leave residue or abrade coatings.
Can you clean a camera sensor at home?
Beginners can safely remove loose dust from a digital sensor with a rubber air blower, held with the camera facing down so particles fall out. Wet cleaning with swabs and solution is a more advanced step with a higher risk of damage. If dust remains after blowing, or you see oily marks, take the camera to a qualified technician or an authorised service centre rather than pressing harder.
How often should you clean your camera and lenses?
Wipe the exterior and lens front after each outing where dust, sea spray or sand was present. Blow out the body and check the sensor every few weeks if you shoot often. Clean lens elements only when you see dust or smudges in your images, since over-cleaning increases wear on coatings. Keep a simple log so you can spot a pattern, such as a lens that collects dust faster than the others.
Can beginners repair a camera with a precision screwdriver set?
Beginners can handle external screws, battery covers and lens-hood fittings with a precision screwdriver set, provided the screw type matches the driver tip exactly. Opening a camera body is a different matter: it involves delicate ribbon cables, shutter mechanisms and light seals. Practise on a non-essential or old body first, photograph each step, and stop if a part resists rather than forcing it.