Last Updated: October 25, 2026
Quick Summary
For most photography students in 2026, the Canon EOS R50 is our top mirrorless camera pick, pairing a beginner-friendly interface with subject-detection autofocus and 4K video. The Fujifilm X-T5 is the strongest APS-C choice for coursework demanding tactile manual controls, while the Sony a6100 suits tight budgets.
- An APS-C sensor is the practical middle ground for students, cheaper than full-frame and more flexible than a phone.
- Put roughly half your total budget into the body and half into a first lens plus essentials.
- The Fujifilm X-T5’s dial-heavy design puts shutter speed, ISO and exposure compensation under your fingers.
- The Nikon Z50II is the value step-up, often paired with a 16-50mm kit lens.
- Buying used stretches a student budget further than anything else, so verify shutter count and sensor condition.
Table of Contents
- Quick Comparison: Best Mirrorless Cameras for Photography Students in 2026
- What to Look for in a Mirrorless Camera as a Photography Student
- The Best Beginner Mirrorless Camera for Learning the Basics
- Best APS-C Mirrorless Camera for Photography Coursework
- APS-C vs Full-Frame: What Photography Students Actually Need
- Total Cost of Ownership: Lenses, Accessories and Upgrades
- Used Mirrorless Camera Buying Checklist for Students
- How to Check a Used Camera Sensor Before You Buy
- Matching a Camera to Your Coursework and Assignments
- Choosing Your First Mirrorless Camera at Kameratalk
- Frequently Asked Questions
Quick Comparison: Best Mirrorless Cameras for Photography Students in 2026
Finding the best mirrorless camera for photography students in 2026 starts with one question: which body teaches you the most without draining your semester budget? The sweet spot sits in the APS-C range, where bodies stay affordable and lens systems grow with you.
Here’s the shortlist we’d hand to any student walking into a camera shop.
| Camera | Type | Best For | Standout Point |
|---|---|---|---|
| Sony a6100 | APS-C | Affordable starter kit | Compact, beginner-friendly body |
| Canon EOS R50 | APS-C | Learning fundamentals | Subject-detection autofocus |
| Nikon Z50II | APS-C | Step-up value | 16-50mm kit-lens option |
| Fujifilm X-T5 | APS-C | Serious coursework | Leading APS-C pick |
| Canon EOS R100 | APS-C | Tight budgets | Simple entry point |
| Sony a6700 | APS-C | All-round assignments | Versatile all-rounder |
| Canon EOS R6 | Full-frame | Advanced coursework | Full-frame value option |
For most students, the Canon EOS R50 is our top pick: it pairs a beginner-friendly interface with subject-detection autofocus and 4K video. It teaches exposure without fighting you.
What to Look for in a Mirrorless Camera as a Photography Student
A mirrorless camera is a digital camera with an interchangeable lens mount and no internal mirror, sending the image straight to an electronic viewfinder or screen. That design keeps bodies lighter and shows you exposure changes live, which is exactly what a learning photographer needs.
Spec sheets reward big numbers. Coursework rewards the right numbers. The trap for students is buying for the spec sheet and discovering the body fights the way you are being taught. Work through the four areas below in order, because they map directly to the exercises most photography courses set in the first two semesters.
Autofocus, Subject Tracking and Eye Detection
Autofocus is where modern mirrorless bodies earn their keep, but for a student the question is not how many subject types the camera recognises, it is whether the autofocus gets out of the way when you switch to manual. Subject-detection autofocus, like the system Canon cites on the EOS R50, tracks faces and eyes so you can concentrate on framing instead of hunting for focus points. For portrait assignments and candid campus work, eye detection alone saves hours of culling soft shots.
The student-specific check is different from the buyer’s check. Put the camera in manual focus, turn the focus ring, and confirm the viewfinder gives you a clear confirmation, focus peaking, a magnified view, or a distance scale. Manual-focus exercises are standard in first-year coursework, and a body that hides those aids behind three menu layers will slow every assignment. Also confirm you can assign autofocus to a rear button, because back-button focus is the technique most tutors teach for documentary and street work.
Sensor Size, Resolution and Image Quality
Sensor size shapes low-light performance and depth of field; resolution decides how far you can crop. An APS-C sensor is the practical middle ground for students: smaller and cheaper than full-frame, sharper and more flexible than a phone. Chasing megapixels beyond your printing needs is money better spent on a lens.
For coursework, resolution matters less than dynamic range and how the files behave when you push them. A 24-megapixel APS-C body with good highlight recovery will teach you more about exposure than a 40-megapixel body whose files fall apart when you lift shadows in a low-light exercise. Check whether the camera shoots RAW in a format your course software opens without a paid plug-in, most courses expect you to submit RAW files alongside JPEGs, and a body that only offers a compressed or proprietary RAW variant can create friction at submission time.
Manual Controls and the Learning Curve
The single most student-relevant feature is not on most spec sheets: how quickly the body lets you change shutter speed, aperture and ISO without leaving the viewfinder. A camera with a dedicated ISO dial, a command dial under your thumb and an exposure-compensation dial you can nudge by feel teaches exposure faster than a touchscreen menu, because you build muscle memory for the exposure triangle instead of reading it off a screen.
Look for a viewfinder that shows a live histogram and exposure compensation in the same view. Those two readouts turn every shot into a feedback loop, which is exactly how manual exposure becomes intuitive. Guided menus and scene modes are useful in week one, but a body that buries the manual controls behind them will hold you back by week six. The best student camera is the one that makes the manual path the easy path.
Lens Mount and Upgrade Path
A camera body is a two-to-three-year purchase; a lens mount is a ten-year decision. Before you commit, check how many affordable used lenses exist for the mount, whether third-party manufacturers make lenses for it, and whether an adapter lets you use older manual glass. A deep used market keeps your second and third lenses affordable as your skills grow, and manual-focus adapters turn cheap vintage lenses into a legitimate way to learn focus and aperture control.
Video and Hybrid Coursework
Many courses now set hybrid assignments, so check that the body records 4K without a crop that changes your framing, offers a microphone input, and has a headphone jack if audio is assessed. A flip-out screen helps for self-shot video and for low-angle and overhead compositions. None of this needs to be cinema-grade; it needs to be predictable enough that you can hand in a clean file.
Before you buy, download the camera’s manual as a PDF and find the page that explains how to set manual exposure. If you cannot follow it in five minutes, the camera will slow your coursework.
Weather Sealing, Battery and Handling
Handling is personal, so hold the body before you buy. Check that the grip fits your hand, that the viewfinder is comfortable with glasses, and that the buttons fall under your fingers without looking. Battery life matters more for students than for professionals because you will shoot long days on a single charge; check the rated shot count and budget for a spare. Weather sealing is a bonus unless your course includes field trips, in which case it is worth paying for.
The Best Beginner Mirrorless Camera for Learning the Basics
The best beginner mirrorless camera is one that makes manual exposure understandable, not intimidating. The Canon EOS R50 fits that brief: its interface is built for newcomers, autofocus handles the hard part while you learn, and 4K video covers hybrid assignments. The Sony a6100 is the affordable-kit alternative if you want a compact body to start with.
Where beginners go wrong is buying the most advanced body they can afford. A simpler camera with clear controls teaches faster than a pro body buried in menus. Look for guided menus and physical dials before you look at frame rates.
Best for: students learning exposure who want autofocus help.
Skip if: you already shoot confidently in manual and want more direct controls.
Best APS-C Mirrorless Camera for Photography Coursework
For coursework that demands detail and control, the Fujifilm X-T5 is the strongest APS-C pick, named a leading APS-C mirrorless camera in recent buying guides. Its dial-heavy design puts shutter speed, ISO and exposure compensation under your fingers, which is exactly how you build muscle memory for assignments.
The Nikon Z50II is the value step-up, often paired with a 16-50mm kit lens. If your course leans on documentary or travel work, that zoom covers the common focal lengths without extra spending. Both bodies run APS-C sensors, so lenses stay smaller and cheaper than full-frame glass.
Best for: students past the basics who want tactile controls.
Skip if: you need a body that fits a very tight first-semester budget.
APS-C vs Full-Frame: What Photography Students Actually Need
APS-C wins for most students. Full-frame sensors offer better low-light performance and shallower depth of field, but they cost more, weigh more, and demand pricier lenses. For learning composition, exposure and light, an APS-C body does the job at a fraction of the outlay.
Full-frame makes sense in specific cases: advanced coursework that specifies it, or a clear plan to shoot professionally in low light. The Canon EOS R6 is a full-frame value option worth comparing if that’s your path.
Here’s the honest trade-off. APS-C gives you more budget for lenses, and lenses shape image quality more than the sensor does. Spend on glass, not on a sensor you can’t afford to feed.
Total Cost of Ownership: Lenses, Accessories and Upgrades
The body is the cheap part. Lenses, memory cards, a spare battery, a bag and a tripod add up fast, and lens purchases dominate a student’s total spend over four years. Budget for the system, not the camera.
A sensible split: put roughly half your total budget into the body and half into a first lens plus essentials. Our guide to what to look for in used lenses covers how to judge glass without overspending, and our roundup of essential accessories for new camera owners lists the extras worth buying early.
Upgrade paths matter too. Choose a lens mount with a deep used market, so your second and third lenses stay affordable as your skills grow.
Used Mirrorless Camera Buying Checklist for Students
Buying used stretches a student budget further than anything else. Run this checklist before you pay:
- Confirm the shutter count is reasonable for the body’s age
- Check the lens mount and body for cracks or dents
- Test every dial, button and the rear screen
- Inspect the sensor for scratches and dust
- Verify autofocus locks on a moving subject
- Confirm the battery holds charge and the charger is included
- Ask for the original receipt and warranty status
Where you buy matters as much as what you buy. Our used gear marketplace comparison weighs the trade-offs between the major platforms so you can pick a safer route. For shutter count specifically, our guide on how to check shutter count on used cameras walks through the process step by step.
How to Check a Used Camera Sensor Before You Buy
A used sensor can hide scratches, dust and dead pixels that ruin every frame. Inspect it before money changes hands: remove the lens, hold the body to a bright light, and look across the sensor at an angle. Then shoot a plain white wall at a small aperture and check the image for spots.
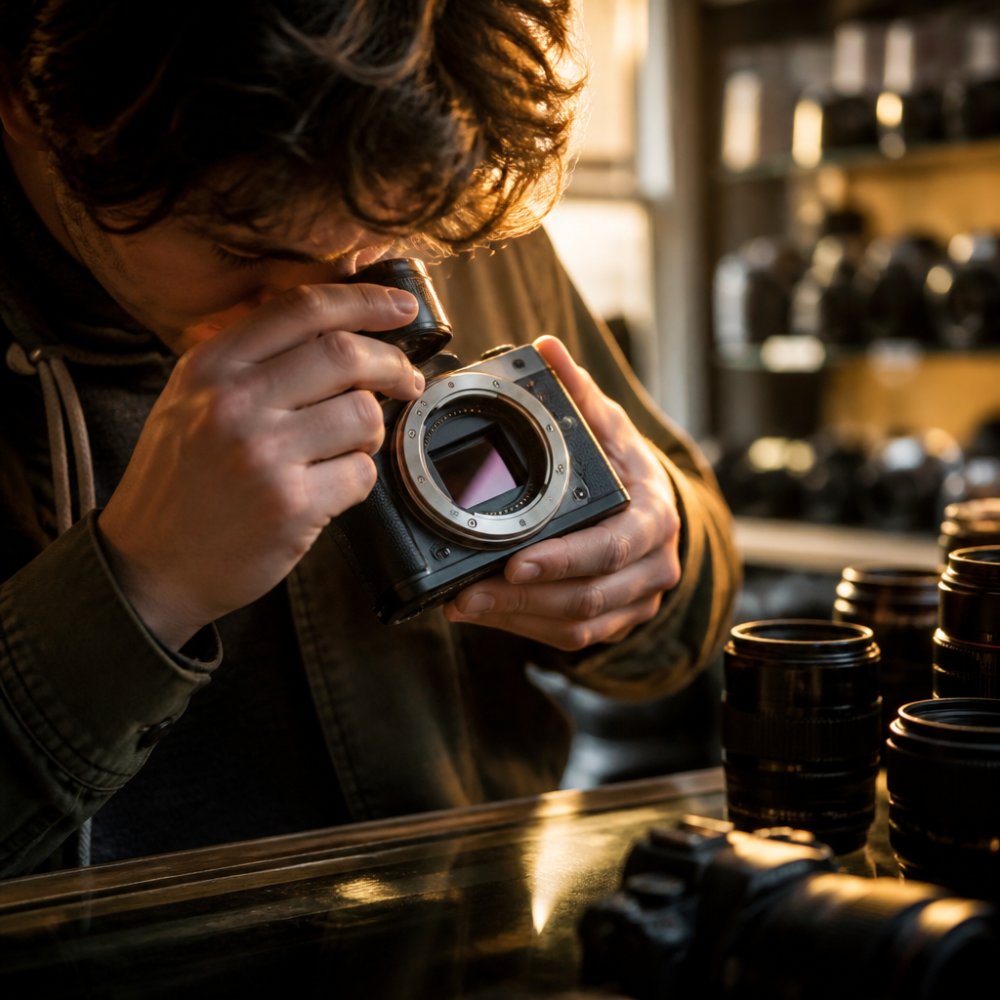
A loupe helps, but a test shot at f/16 reveals dust and scratches clearly. Dead pixels show as bright dots in a dark frame. Our step-by-step guide to inspecting a used camera sensor covers each check in detail, so you can walk into a sale knowing exactly what to look for.
Watch out: skipping the test shot is the classic mistake. Dust looks harmless on the screen and shows up as dark blobs in every landscape you shoot.
Matching a Camera to Your Coursework and Assignments
Match the body to the assignments you’ll actually shoot, not to the spec sheet. This is the section most buying guides skip, and it is the one that decides whether a camera helps or hinders your degree. Below is a practical map from common coursework tasks to the camera features that actually matter for each.
Manual Exposure Exercises
Almost every first-year course sets a manual-exposure assignment: shoot the same scene at different shutter speeds, apertures and ISOs, then explain the results. The camera feature that matters here is fast, unambiguous access to the three exposure settings plus a live histogram and exposure-compensation readout in the viewfinder. A body with dedicated dials lets you run the exercise by feel; a menu-driven body turns it into a scavenger hunt. Check that the camera shows a blinking highlight warning (zebra or clipping display) so you can see overexposure before you shoot.
Portrait and Lighting Assignments
Portrait modules reward eye-detection autofocus and a viewfinder that stays bright when you stop down for studio strobes. If your course uses off-camera flash, confirm the body has a standard hot shoe and a sync speed you can work with, and that it can trigger strobes with a cheap radio trigger. A body that only offers a proprietary multi-interface shoe may need an adapter, which is an extra cost and an extra failure point in the studio.
Documentary and Street Work
Documentary modules reward a compact body with quiet operation, good battery life and fast start-up. Look for a silent electronic shutter, a rear screen you can tilt for waist-level shooting, and autofocus that stays locked on a moving subject without hunting. Back-button focus and a small prime lens matter more here than frame rate. If your course includes consent and ethics discussions, a silent shutter also helps you shoot without drawing attention.
Low-Light and Night Assignments
Low-light exercises expose the difference between sensor sizes. An APS-C body with good high-ISO behaviour and in-body image stabilisation will handle most night assignments; a full-frame body gives you roughly a stop more headroom but costs more and demands pricier lenses. Check the camera’s stabilisation rating and whether it works with adapted or manual lenses, because a stabilised body lets you hand-hold slower shutter speeds and learn without a tripod.
Wildlife, Sport and Fast-Action Modules
These modules push you toward faster continuous shooting, a deeper buffer and stronger subject tracking. Check the burst rate with autofocus enabled, not the headline rate without it, and confirm the buffer clears quickly enough that you are not waiting between sequences. A body with a pre-burst or pro-capture mode is a genuine advantage for timing exercises.
Video and Hybrid Assignments
Hybrid modules reward 4K without a heavy crop, a microphone input, a headphone jack and a flip-out screen. Confirm the camera does not overheat during long takes and that it records a file format your editing software accepts. A body that records clean 4K for thirty minutes is more useful for coursework than one that shoots 8K for five minutes before throttling.
Studio and Tripod Work
Studio modules reward handling and physical controls more than weight. A tilting screen, a bright viewfinder and a hot shoe you can trust matter more than portability. If your course includes tethered shooting, check that the camera works with the tethering software your department uses, this is the single most common compatibility surprise students hit in second year.
A Practical Way to Choose
Write down your three most common assignment types, then check the camera against them. If most of your work is handheld and on the move, prioritise portability and image stabilisation. If you shoot studio or tripod work, handling and physical controls matter more than weight. If your course is hybrid, prioritise video features and audio inputs over stills specs.
The Sony a6700 is the versatile all-rounder here, recommended as a broadly suitable option for varied work. It won’t excel at one niche, but it handles most coursework without complaint. The Fujifilm X-T5 suits students whose course leans on manual control and tactile dials, while the Canon EOS R50 suits students who want autofocus to carry them through the first semester.
The camera that matches your coursework is the one whose controls match the exercises you are set. Buy for the assignments you will actually shoot, not for the ones in the brochure.
Choosing Your First Mirrorless Camera at Kameratalk
The right first camera is the one you’ll actually carry and learn on. Start with an APS-C body, put real money into one good lens, and buy used where you can verify the condition. That combination beats a flashy full-frame kit every time for a student.
Our guides cover sensor checks, shutter counts, lens buying and marketplace comparisons, all built for people learning the craft on a budget.
Frequently Asked Questions
What is the best mirrorless camera for a photography student?
There is no single answer, because it depends on your coursework and budget. Beginner-friendly models with guided menus and reliable autofocus, such as the Canon EOS R50 or Nikon Z50II, suit students learning manual exposure. If your course leans on image quality and physical controls, an APS-C body like the Fujifilm X-T5 is a strong pick. Compare handling in person and check lens prices before deciding.
Is a full-frame camera necessary for photography students?
No. Most coursework is about exposure, composition and light, and an APS-C mirrorless camera handles that well while costing less and weighing less. Full-frame bodies like the Canon EOS R6 offer better low-light performance and dynamic range, but the lenses cost more. Choose full-frame only if your assignments specifically call for it or you plan professional work.
What should I check on a used camera sensor before buying?
Set the camera to a small aperture, point it at a plain bright surface and take a test shot, then inspect the image for dark spots or streaks. Shine a light into the mount with the lens off and look for scratches or haze. Check the shutter count, test every dial and button, and confirm autofocus works across the frame before you pay.
How much should a photography student spend on a mirrorless camera?
Set a budget for the body plus at least one lens, and leave room for a memory card, spare battery and bag. A used body from a reputable dealer often gives more camera for the same money than a new entry-level kit. Prices vary by model and condition, so check current listings before committing.
Your first camera won’t be your last, and that’s fine. The goal is to learn fast on a body that doesn’t fight you and a lens that rewards practice. Pick an APS-C model from the shortlist, run the used checklist if you buy secondhand, and put the savings into glass. Get started with Kameratalk and build a kit that grows with your skills instead of draining your budget.