Last Updated: November 19, 2026
Quick Summary
To buy used camera gear from a store, inspect it in a fixed order: body, sensor, lens, then controls, and ask about shutter count, repair history, warranty, and the return window before paying. A store purchase adds a return window and a paper trail that private listings cannot match.
- Condition grades describe appearance more than performance, so verify the label yourself.
- Set the camera to f/16 or f/22 and shoot a plain bright surface to reveal sensor spots.
- Shine a flashlight through lens glass from both ends to check for fungus and haze.
- Ask for the warranty and return policy in writing, since a verbal promise is hard to enforce.
- If the price gap between store and market is large, inspect harder and ask why.
Table of Contents
- Why a Store Beats a Private Listing for Used Camera Gear
- Reading Condition Grades Before You Touch the Camera
- Your Used Camera Buying Checklist for the Counter
- How to Test a Used Camera Lens in the Shop
- Questions to Ask When Buying a Used Camera
- Comparing Used Camera Warranty and Return Policy Terms
- Comparing Prices and Total Cost of Ownership
- Testing Gear Safely Without Damaging It
- Building Your Used Camera Gear Shortlist at Kameratalk
- Frequently Asked Questions
Why a Store Beats a Private Listing for Used Camera Gear
Buying used camera gear from a store gives you something a private listing never can: a return window, a paper trail, and someone to call when the autofocus hunts. That matters more than the price tag. Too many first-time buyers save a little on a marketplace deal and lose it all on a dead shutter two weeks later.
A store sells you an item with a policy attached. A private seller sells you a story.
That doesn’t make marketplaces useless. But if you’re spending real money on a camera body or a lens you plan to keep, the store route removes most of the risk. You can hold the gear, fire the shutter, and check the sensor before any money moves.
Below, we’ll walk through exactly how to inspect used camera gear at the counter, what the condition grades actually mean, and the questions that separate a good deal from an expensive lesson.
Reading Condition Grades Before You Touch the Camera
Condition grades are shorthand, and every store writes them a little differently. The label is a starting point, not a verdict.
Most shops use a scale from „like new“ down to „well used“ or „bargain.“ A grade of excellent usually means light wear and full function. A lower grade means visible marks, missing accessories, or cosmetic damage.
What most guides miss: the grade describes appearance more than performance. A body graded „good“ can be mechanically perfect. A „like new“ lens can still have fungus inside.
So read the grade, then verify it yourself. Treat the label as the seller’s opinion, not a guarantee.
Watch out: some shops grade conservatively and some generously. Never let a high grade stop you from running the full inspection below.
Your Used Camera Buying Checklist for the Counter
A used camera buying checklist turns a nervous purchase into a repeatable routine. Work through it in the same order every time, and you won’t miss the obvious faults. The goal is not to find reasons to walk away, it is to gather enough evidence that you can pay without second-guessing yourself on the train home.
Start with the outside, then move inward. Body first, then sensor, then lens, then the controls. Keep the same sequence across every candidate so you can compare them fairly.
Bring a few things with you: a small flashlight, a clean memory card, a fully charged battery that fits the model if you own one, and your own lens if the mount matches. Shops usually let you test with your own card, so you can review sample images later on a larger screen. Ask before you format anything or change menu settings.
Inspecting the Camera Body
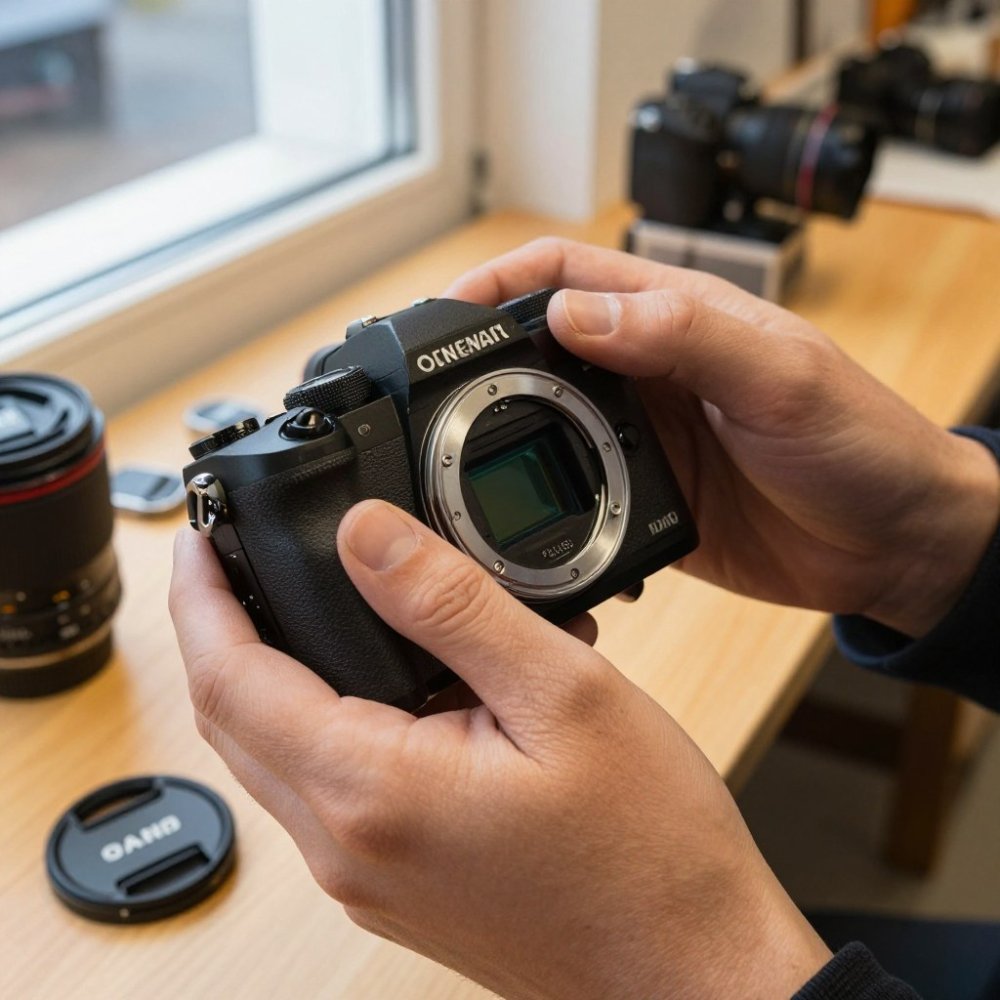
Run your eyes and fingers over the whole body before you power anything on. Look for cracks, dents, and loose seams. Check the battery door, card slot cover, and port flaps for play, a flap that does not sit flush is a sign the body has been dropped or pried open.
Then check the parts that wear:
- Grips and rubber: peeling or shiny, worn rubber hints at heavy use. A grip that has gone slick is uncomfortable in the hand and expensive to replace.
- Mount: look for scratches or play where the lens seats. A mount with visible gouges can throw off lens alignment.
- Screws: chewed or missing screws suggest a past repair. Compare screw heads across the body, mismatched heads usually mean someone has been inside.
- Screen: check for deep scratches and dead pixels. Tilt the screen against the light; surface scuffs are cosmetic, but a bright or dark dot that stays put is a failing panel.
- Buttons and dials: press every one. They should click cleanly, not mush. Spin each dial through its full range and confirm the values change on screen.
- Ports: open every flap and look inside the USB, HDMI, and mic sockets for bent pins or corrosion.
Power the body on and watch the startup. A slow or flickering start, a date that resets, or a menu that freezes are all reasons to hand it back. Then check the viewfinder: look through it against a plain wall and confirm the diopter adjusts and the display is even.
Ask about repair history. A body that’s been opened isn’t automatically bad, but you deserve to know. If the shop cannot tell you, treat that as a data point rather than a dealbreaker.
If you want a deeper method for testing shutter speed accuracy on the spot, our guide on 7 ways to test a used camera’s shutter speed walks through the practical options.
Checking Shutter Count and Sensor Condition
Shutter count tells you how much life the mechanism has left. Most mirrorless and DSLR bodies store it, and many shops will read it for you or let you check with a free tool. Ask the staff to show you the reading on the camera itself rather than quoting a number from memory.
A high count isn’t a dealbreaker, but it should lower the price and raise your caution. Ask the staff what the expected shutter life is for that model, then judge the count against it. A body at half its rated life with a clean sensor is often a better buy than a low-count body with a scratched filter stack.
Sensor condition matters just as much. Set the camera to a small aperture, f/16 or f/22, point it at a plain bright surface such as a white wall or a sheet of paper, and take a shot slightly out of focus. Then zoom in on the image and look for dark spots or streaks. Dust is common and easy to clean. Scratches or a stained coating are not.
Repeat the shot at a normal aperture and at a wide aperture. Spots that vanish when the lens opens up are usually on the lens or the mirror box; spots that stay sharp at every aperture are on the sensor itself. That distinction is what separates a cleanable body from a rejected one.
Watch out: a sensor that looks clean on the rear screen can still show banding or hot pixels in the files, so review the sample images on a computer before the return window closes.
For a step-by-step method, see how to check shutter count on used cameras. And if you want a fuller pass over the sensor, our 8 checks to inspect a used camera sensor condition covers the defects worth rejecting a body over.
How to Test a Used Camera Lens in the Shop
Testing a used camera lens means checking the glass, the mechanics, and the autofocus, in that order. A clean-looking lens can still fail all three.
Shine your flashlight through the glass from both ends. Look for scratches on the front and rear elements, and for the telltale web-like growth of fungus. Haze shows up as a milky film; dust is usually harmless.
Then work the mechanics. Turn the focus ring and check it moves smoothly with no grinding. Test the zoom if it has one. Mount it on a body and confirm the autofocus locks quickly and quietly.
Take sample images at a few apertures and review them on the screen. Soft corners wide open can be normal. A blurry patch that stays put is not.
For a broader set of criteria, our used lens buyer’s guide covers what to look for across mounts and types. And if you spot something suspicious in the glass, read up on signs of fungus in vintage camera lenses before you commit.
Questions to Ask When Buying a Used Camera
The right questions when buying a used camera get you information the listing never shows. Ask them before you pay, not after.
Useful questions to ask at the counter:
- What’s the shutter count, and how was it read?
- Has this body or lens been repaired, and by whom?
- What exactly does the warranty cover, and for how long?
- What’s the return window, and do I need the original packaging?
- Are all the original accessories included?
- Can I see the serial number and confirm it matches the listing?
- Is the price final, or is there room on a bundle?
Staff who answer clearly and without hedging are a good sign. Vague answers about repair history are a warning.
A common mistake is not asking about the return policy until after paying. Ask first, since it changes how carefully you test.
Comparing Used Camera Warranty and Return Policy Terms
A used camera warranty and return policy are the two things that make a store purchase worth the premium. Read both before you commit.
Warranty terms vary a lot. Some shops offer a short mechanical guarantee; others sell an extended plan. Check what’s covered: shutter failure, autofocus, sensor faults, and water damage are often treated differently.
Return windows matter just as much. A short window means you must test everything fast. A longer one gives you room to shoot a real session and review the files at home.
| Term | What to Check | Why It Matters |
|---|---|---|
| Warranty length | Days or months covered | Short cover means test immediately |
| What’s covered | Mechanical vs. cosmetic | Cosmetic faults rarely qualify |
| Return window | Days to return | Longer window lets you shoot real tests |
| Condition for return | Original packaging, accessories | Missing parts can void the return |
| Buyer protection | Store policy vs. card scheme | Card schemes can add a layer |
Ask for the policy in writing. A verbal promise is hard to enforce.
Comparing Prices and Total Cost of Ownership
Comparing prices means looking past the sticker. The retail price of a new body, the market price of a used one, and the total cost after warranty and accessories are three different numbers. Most buyers stop at the first and regret it later.
Do a quick price check across a few listings for the same model and condition grade. That gives you a fair market price to judge the store’s offer against. Look at what the body sells for in the same grade, not the cheapest example in any grade, a bargain listing is usually a lower grade in disguise.
Then build the real number. Add up everything you would need to shoot the day you get home:
- Battery and charger: many used bodies ship with one tired battery and no charger. A replacement battery and charger can add a meaningful amount to the sticker.
- Memory card: if the shop does not include one, budget for a card that matches the body’s speed.
- Strap and bag: small items, but they add up.
- Lens hood and caps: missing hoods and caps are cheap to replace but easy to overlook.
- A cleaning kit: a used sensor usually needs a wet clean before you trust it.
Now compare that total against the private-listing alternative. A store price that’s slightly higher than a private listing often wins once you count the warranty and return window. You’re paying for buyer protection, and that has value. The question is whether the gap is small enough to be worth it.
A useful way to frame it: if the store charges more but includes a return window and a mechanical guarantee, the premium is buying you the right to test the gear properly and hand it back if it fails. If the private listing saves you that amount but leaves you with no recourse, you are self-insuring, and a single shutter or autofocus repair can wipe out the saving.
Our rule of thumb: if the gap is small, take the store. If the gap is large, ask why, and inspect harder. A large gap between a store and the market usually means one of three things, the grade is lower than the label suggests, an accessory is missing, or the item has a repair history the listing does not mention.
Ask about bundles, too. Many shops will include a card, a spare battery, or a bag if you ask, and a bundle can close the gap without a discount. If the price is firm, ask whether the shop will throw in a cleaning or a short extension of the return window instead.
Watch out: a discount that comes with a shortened return window or a warranty exclusion shifts risk back to you.
Testing Gear Safely Without Damaging It
Test before buying, but test carefully. You’re handling someone else’s stock, and damage can turn into a charge.
Keep the caps on until you’re ready to inspect the glass. Hold the body with a strap or over the counter, never dangling by the lens. Don’t force a stiff mount or a stuck dial.
Ask before you change settings or format a card. Use your own card for sample images so you don’t touch the shop’s files.
If something feels stuck, stop and hand it to staff. Forcing it is how buyers end up owning a repair bill.
Building Your Used Camera Gear Shortlist at Kameratalk
The best way to buy used camera gear from a store is to arrive prepared, inspect in a fixed order, and ask the questions most buyers skip. Do that, and the store becomes your safest route to good gear.
Kameratalk focuses on analog and digital camera expertise, gear, stores, and community. Readers can learn the inspection routine and approach used gear purchases with more confidence.
Start with a shortlist. Pick two or three bodies or lenses that fit your budget, then run the same checklist on each. The right deal usually becomes obvious.
Walking into a store without a plan is how good gear turns into a bad story. Kameratalk gives you the guides, checklists, and community know-how to inspect used camera gear properly and buy with confidence. Compare listings, learn the routine, and protect your budget.
Frequently Asked Questions
What should I check when buying a used camera from a store?
Start with the body: look for dents, cracks, and loose port covers, then check that every dial and button moves cleanly. Inspect the sensor for dust or scratches with a loupe or bright light. Test autofocus on a few subjects at different distances, fire the flash, and confirm the memory card slot reads and writes. Before paying, ask what the used camera warranty and return policy cover.
How do I test a used camera lens before buying it?
Shine a light through both ends and look for scratches, fungus, haze, and dust inside the lens elements. Turn the focus ring slowly to feel for grinding or play, and check that the aperture blades move smoothly. Mount it on a body, shoot wide open and stopped down, then review sample images on the rear screen for sharpness across the frame. Test autofocus at close range and at infinity, and confirm the lens mount locks without wobble.
Is it better to buy used camera gear from a store or a private seller?
Buying from a store generally gives you a condition grade, a return window, and possibly a warranty, which a private seller rarely offers. Check each term before you buy. Private listings can be cheaper, but you carry the risk of hidden faults and no recourse. For a first used purchase, the store route is the safer way to learn what good condition actually looks like.
Do used cameras from stores come with a warranty?
Many used camera sellers offer a limited warranty, though terms vary. Ask what is excluded, who handles repairs, and whether the warranty is with the store or a third party. Check the return policy too, since a longer window lets you test the camera properly at home. Get both terms in writing before you leave.