
Last Updated: November 9, 2026
Quick Summary
Common issues with used digital cameras include worn shutters, aging proprietary batteries, cracked LCD ribbons, bent memory card slot pins, sensor dust, haze or fungus in lenses, and drifting autofocus. Check shutter count, test every dial and port, and walk away when repair costs approach the body’s value.
- Shutter count is the closest thing a used digital camera has to a mileage reading.
- Loose sensor dust often shifts with a blower, but fungus etches lens coatings permanently.
- Test the memory card slot five times, since bent pins often cost more to fix than the body is worth.
- A proprietary battery with no new replacements available is a paperweight waiting to happen.
- Run a stress test in week one while the return window is still open.
Table of Contents
- Why Used Digital Cameras Fail More Often Than Film Bodies
- How to Check Shutter Count Before You Hand Over Money
- The Used Camera Inspection Checklist for a Private Viewing
- Battery Health, Proprietary Cells and Why Replacements Matter
- LCD Screens, Dead Pixels and Viewfinder Faults
- Lens Mount, Autofocus and Hot-Shoe Problems
- Memory Card Slots, Write Speed Errors and Firmware Bugs
- What Camera Sensor Cleaning Costs and When to Walk Away
- Serial Numbers, Grey Market Gear and the Repairability Question
- Your Post-Purchase Maintenance Checklist for the First Month
- Frequently Asked Questions
Why Used Digital Cameras Fail More Often Than Film Bodies
A used digital camera packs decades of electronics into a body that was never designed to be serviced forever. That is the core tension behind many questions about common issues with used digital cameras: the mechanical parts are predictable, but the electronics are not. A film body from the 1970s can often be revived with a clean, a new light seal and a fresh battery. A digital body from 2012 may look pristine and still be one failed ribbon cable away from the bin, because spare parts stopped being produced years ago.
Mechanical wear is the honest part of the equation. Shutter blades, mirror assemblies and dials degrade in ways you can measure. Electronic wear is the sneaky part. Capacitors age, flex cables crack, and image sensors accumulate defects that only show up under specific conditions.
The Parts That Wear Out First
The usual suspects are:
- Shutter mechanism and its actuation count
- Proprietary battery cells that no longer hold charge
- LCD screen ribbons and hinge cables
- Lens mount tolerances after years of lens changes
- Memory card slot pins, bent by impatient card swaps
- Hot-shoe contacts, corroded or bent
- Autofocus accuracy drifting after impact damage
The pattern matters more than any single item. A camera with one worn part is normal, while several worn parts together can make the body a project rather than a straightforward purchase.
How to Check Shutter Count Before You Hand Over Money
Shutter count is the number of times the shutter has fired, and it is the closest thing a used digital camera has to a mileage reading. Ask the seller for it before you travel to a viewing, and verify it yourself on arrival. Many mirrorless and DSLR bodies can record the figure in the EXIF data of an image, so requesting a fresh photo straight from the camera rather than a screenshot is a sensible check.
Some brands hide the count behind a service menu or a paid diagnostic. If the seller cannot or will not produce it, treat that as information in itself. A low count on a ten-year-old body can also mean the camera sat unused for years, which brings its own problems: dried lubricants, seized dials and batteries that have gone flat and stayed flat.
For a full walkthrough of the menu routes and EXIF tools, see our guide on how to check shutter count on used cameras before you commit to anything.
The Used Camera Inspection Checklist for a Private Viewing
Bring a lens you trust, a freshly charged battery, a formatted memory card, a small torch and a laptop or tablet for reviewing files. Then work through this used camera inspection checklist in order, because each step can narrow down what the next one reveals. The goal is not to find one fault, it is to build a profile of how the body has been treated.
1. Shutter and mirror cycle. Fire the shutter at every speed from 1/4000 down to 1 second, then bulb. Listen for a lazy or sticky slow-speed cycle, which points to dried lubricant in the shutter assembly. On a DSLR, watch the mirror return smoothly; a mirror that hangs or slaps hard suggests a worn return spring. Be aware that a camera that fires well at high speed but stumbles at 1/15 or slower may need more than a simple fix.
2. Sensor dust and defect mapping. Set the lens to f/16, defocus to infinity, and shoot a plain white wall or a sheet of paper under even light. Open the file at 100% on your laptop and scan the frame in a grid. Loose dust appears as soft dark blobs that move between frames; welded dust or sensor defects stay in the same pixel position. Take two frames a minute apart and compare, if the spots moved, a blower will likely handle it. If they did not, budget for a wet clean or a sensor repair.
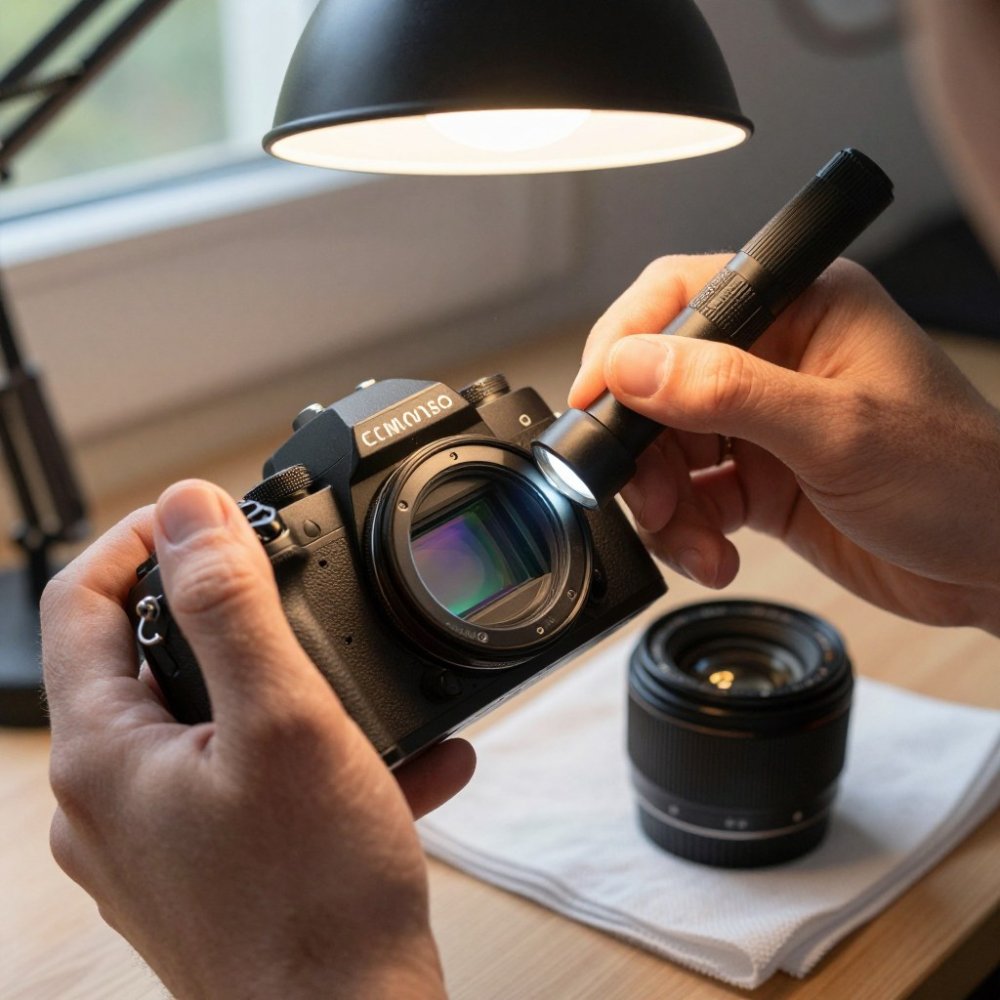
3. Lens mount and chamber inspection. Remove the lens, shine the torch through the mount, and look at the chamber walls, the mirror box (on a DSLR) and the sensor cover glass. You are looking for haze (a milky film on glass surfaces), fungus (branching filaments, often white or yellow), and oil on the aperture blades visible through the lens. Fungus etches coatings and, in bad cases, the glass itself, cleaning removes the organism but not the damage. Haze and fungus are walk-away signals unless the price reflects a replacement lens.
4. Button, dial and port sweep. Press every button, turn every dial through its full range, and open every port door. Pay particular attention to the memory card slot, push a card in and out five times and confirm it clicks cleanly every time. Bent pins in the card slot are a repair that often costs more than the body is worth. Check the battery compartment for corrosion or swelling, and confirm the battery release latch springs back.
5. Autofocus accuracy. Mount your trusted lens and test at close range (around 1 m), at mid distance (3-5 m) and at infinity, in both directions, near-to-far and far-to-near. On a DSLR, check for consistent front- or back-focus; on a mirrorless body, check that eye detection locks and holds. A body that hunts in one direction but not the other often has a worn AF motor or a dirty AF sensor. Test with two lenses if the seller allows, because a fault that follows the lens is a lens problem, not a body problem.
6. LCD and viewfinder. Display a solid white, then solid black, then solid red frame and scan the panel closely for dead pixels (always black), stuck pixels (always one colour) and spreading lines. A single stuck pixel is cosmetic; a cluster or a line usually means the panel or its ribbon is on the way out. Then check the optical viewfinder or electronic viewfinder separately: the dioptre adjustment should move smoothly, the eyepiece should be clean, and the image should not flicker or cut out when you tilt the body.
7. Flash and hot-shoe. Mount a flash and fire it ten times in quick succession. Confirm consistent triggering and check that the hot-shoe contacts are clean and springy. Corroded contacts cause intermittent misfires that are maddening to diagnose later. If the body has a pop-up flash, fire it and confirm it latches and releases cleanly.
8. Exposure meter and image stabilisation. Compare the camera’s meter against a known-good body or a phone light meter at the same scene. A meter that is consistently one or two stops off is a calibration issue; one that jumps around is an electronics fault. Engage image stabilisation, half-press, and listen for grinding or rattle that suggests a failed assembly. On in-body stabilisation systems, a faint hum is normal; a clunk is not.
9. Serial number and paperwork. Confirm the serial number on the body matches the box, the receipt and any service paperwork. A mismatched number suggests a swapped body or a repair history the seller has not disclosed. Photograph the serial plate and the receipt before you hand over money.
The man is German.
Sensor Dust, Haze and Fungus: What You Can and Cannot Fix
Sensor dust is usually the cheapest problem on the list. Loose particles often shift with a blower, and a wet clean handles the rest. Haze and fungus are a different category entirely. Fungus etches into lens coatings and, in bad cases, into the glass itself. Cleaning removes the organism but not the damage it left behind, which is why a fungus-affected lens never quite performs like a clean one.
In general, dust can be a negotiation point, while fungus is often a reason to walk away unless the price reflects a replacement lens. If you want to grade sensor condition properly before committing, work through our used camera sensor inspection checks and read up on the early signs of fungus in vintage lenses, because both problems are far easier to spot with a torch and a test frame than with a hopeful eye.
Battery Health, Proprietary Cells and Why Replacements Matter
A proprietary battery is the single most underrated risk in used gear. Camera makers change cell formats constantly, and third-party replacements vary wildly in quality. A body that only accepts a discontinued cell type is a paperweight waiting to happen.
Test it properly. Charge the battery fully, shoot continuously for ten minutes with the screen on, and watch how fast the indicator drops. Then check whether genuine replacements are still sold new. If the only options are used cells of unknown age, budget for that in your offer. Battery life on a decade-old pack is rarely what the original spec promised.
LCD Screens, Dead Pixels and Viewfinder Faults
Dead pixels on an LCD screen are easy to miss in a bright room and obvious in the dark. Display a solid colour frame and scan the panel closely. A single stuck pixel is cosmetic; a cluster or a spreading line usually means the panel or its ribbon is on the way out.
Then check the optical viewfinder or electronic viewfinder separately. Dioptre adjustment should move smoothly, the eyepiece should be clean, and the image should not flicker or cut out when you tilt the body. Image stabilization deserves a test too: engage it, half-press, and listen for grinding or rattle that suggests a failed assembly.
Lens Mount, Autofocus and Hot-Shoe Problems
Lens mount wear shows up as play when a lens is attached. A tiny amount is normal on a well-used body; visible rocking is not. Mount a lens and gently test for movement, then check that the electronic contacts are clean and springy.
Autofocus accuracy problems often trace back to the lens rather than the body, which is why you should test with a lens you trust or ask to try two. Our guide to evaluating used lenses covers the mount-side checks in detail. Finally, fire a flash on the hot-shoe and confirm consistent triggering; corroded contacts cause intermittent misfires that are maddening to diagnose later.
Memory Card Slots, Write Speed Errors and Firmware Bugs
Push a card in and out five times. It should click cleanly every time. Bent pins in the memory card slot are a repair that often costs more than the body is worth, so test with two different cards and shoot a short burst to check write speed behaviour.
Firmware update history matters here. Ask whether the body is on the latest version, and check the manufacturer’s site yourself. Some older bodies have known bugs that a firmware update fixes; others have firmware so old that certain cards simply will not work. A camera that throws card errors on a known-good card is telling you something.
What Camera Sensor Cleaning Costs and When to Walk Away
Professional camera sensor cleaning costs vary by shop and by how much disassembly is needed, so ask a repair shop for a quote.
Walk away when the repair bill approaches the value of the camera. A reasonable rule of thumb is that if the fix costs more than a large share of the body’s price and the camera has other faults, it may be better to walk away. Dust you can live with. A sensor that needs work plus a tired battery plus a sticky dial is three problems wearing one coat.
Serial Numbers, Grey Market Gear and the Repairability Question
Check the serial number against the box, the receipt and the manufacturer’s records where possible. A mismatched number suggests a swapped body or a repair history the seller has not disclosed. Grey market gear, imported outside official channels, can be refused for service altogether, which turns a small fault into a total loss.
This is where the repairability question decides the purchase. Before buying, search for the model’s service manual availability, check whether the manufacturer still stocks parts, and look at whether independent repairers will touch it. A second-hand body with a strong repair ecosystem is worth more than a refurbished one with none. For online purchases, where serial and grey market risks are highest, our guide to buying used cameras from online portals sets out the questions to ask before paying.
Your Post-Purchase Maintenance Checklist for the First Month
The first month tells you whether you bought well. Run this routine while the return window is still open, because most hardware failure on used bodies surfaces early, and you want the evidence before the seller’s goodwill expires, not after.
Week one: baseline and stress test. Shoot a few hundred frames across the ISO range and review every file at 100% for spots, banding, hot pixels or card errors. Log the shutter count from the first and last frame so you have a baseline to compare against future readings. Note the firmware version and back up your settings to a card. Watch out: a body that throws a card error once in week one will throw it again under pressure, reformat the card in-camera and re-test before you assume it was the card’s fault.
Week two: clean and re-test. If the week-one frames showed dust, do a proper wet clean or have a shop do it, then re-shoot the white-wall test at f/16. A clean that removes the spots confirms the sensor surface is sound; spots that survive a wet clean point to contamination under the cover glass, which is a service-centre job. This is also the week to inspect the lens mount and chamber with a torch and confirm no haze or fungus has appeared since purchase.
Week three: power and endurance. Cycle the battery fully twice, charge to 100%, shoot until the camera shuts down, then recharge, and note the real-world drain against the original spec. If the body accepts a discontinued cell type, start hunting for a genuine spare now rather than when the current pack dies. Check whether the manufacturer still stocks parts for the model and whether independent repairers will touch it; a second-hand body with a strong repair ecosystem is worth more than a refurbished one with none.
Week four: calibration and documentation. Run an autofocus calibration check against a test chart or a ruled surface at 45 degrees, and confirm the meter agrees with a known-good reference. Install any firmware update the manufacturer lists, then re-test the functions you rely on most. Photograph the serial plate, the receipt and the service paperwork, and store them with your settings backup. A calibration check on autofocus and a spare battery purchase round out the month.
Many buying guides focus on what to check before you pay; the post-purchase period is a useful addition to that. The first month is when you convert a used purchase into a known quantity, or discover, inside the return window, that you bought a project rather than a camera.
Buying used gear rewards preparation, not luck. At Kameratalk, we help photographers make that preparation practical, with inspection guides, gear breakdowns and a community that shares what actually goes wrong. Our articles walk you through shutter count checks, sensor inspection and lens evaluation step by step, and our community forum lets you compare notes with other buyers before you spend. Get started with Kameratalk and buy your next used camera with a checklist instead of a hope.
Frequently Asked Questions
What is the most common failure in older digital cameras?
The shutter mechanism and the battery are the two parts that fail most often. Shutter actuation counts climb steadily and the assembly eventually wears out, while proprietary battery cells lose capacity after years of charging cycles. Sensor dust and fungus in lenses are also frequent on bodies stored without caps. Check shutter count first, then budget for a replacement battery, because a camera that will not hold charge is unusable regardless of how clean the sensor looks.
How do I know if a camera sensor is damaged?
Shoot a plain white wall or a sheet of paper at a small aperture such as f/16, then inspect the image at full size on a computer. Dark spots that stay in the same place across several frames are dust or, worse, corrosion on the sensor. Coloured streaks, banding or a cluster of dead pixels point to hardware failure rather than dirt. Repeat the test at a wide aperture to see whether the marks sharpen, which tells you they sit on the sensor surface itself.
Is it safe to buy used camera gear from private sellers?
It can be, provided you inspect in person and pay in a way you can reverse. Ask for the serial number in advance, confirm it matches the body and the original packaging, and request the shutter count in writing. Test autofocus accuracy, the memory card slot and the hot-shoe before money changes hands. Private sales often exclude the statutory warranty that a commercial dealer must provide, so a careful inspection is an important form of protection.
What should I check first when buying a second-hand camera?
Start with shutter count and battery health, because both tell you how hard the body has been worked. Then mount a lens and test autofocus accuracy at close range and at infinity, and fire the flash through the hot-shoe. Finish with a sensor check at f/16 and a burst of shots to a memory card to confirm write speed and slot reliability. If any of those fail, it may be worth stopping there rather than negotiating, since repairs on older bodies can sometimes exceed what the camera is worth.