
Table of Contents
- Why Guest Photos Are Important for Events
- How Guest Photos Capture What Professional Photographers Miss
- How to Collect Photos from Event Guests
- Event Photo Sharing Ideas That Actually Work
- Event Photography Etiquette for Guests
- Event Photo Collection Tools and Methods
- Privacy, Permissions, and Photo Management
- Organizing and Preserving Guest Photos Long-Term
- Frequently Asked Questions
Last Updated: October 11, 2026
Why Guest Photos Are Important for Events
Guest photos events are the moments your professional photographer misses. While a hired photographer captures the formal shots and key moments, your guests see different angles, candid interactions, and genuine emotions happening simultaneously across the venue. This is why guest photos matter for events, they create a complete visual record that no single professional can deliver alone.
Your guests have phones and cameras. They’re already taking pictures. The question is whether those images stay scattered across personal devices or become part of your event’s permanent memory.
Guest photos events preserve details professionals might overlook: the friend group laughing in the corner, the child’s reaction during the cake cutting, the quiet moment between two people. These candid shots often become the most treasured images from the day. When you collect guest photos from events, you’re not just gathering images, you’re preserving how the event actually felt to the people who were there.
How Guest Photos Capture What Professional Photographers Miss
A professional photographer works from a shot list. They position themselves for key moments and execute their vision. It’s structured, intentional, and produces polished results. But a professional can only be in one place at one time.
Your guests, meanwhile, are everywhere. They capture multiple perspectives simultaneously. One guest photographs the moment from the left side while another shoots from the right. Someone catches a reaction from across the room. Another guest films a quick video of the dancing. These candid moments and different angles create a richer narrative than any single photographer could provide.
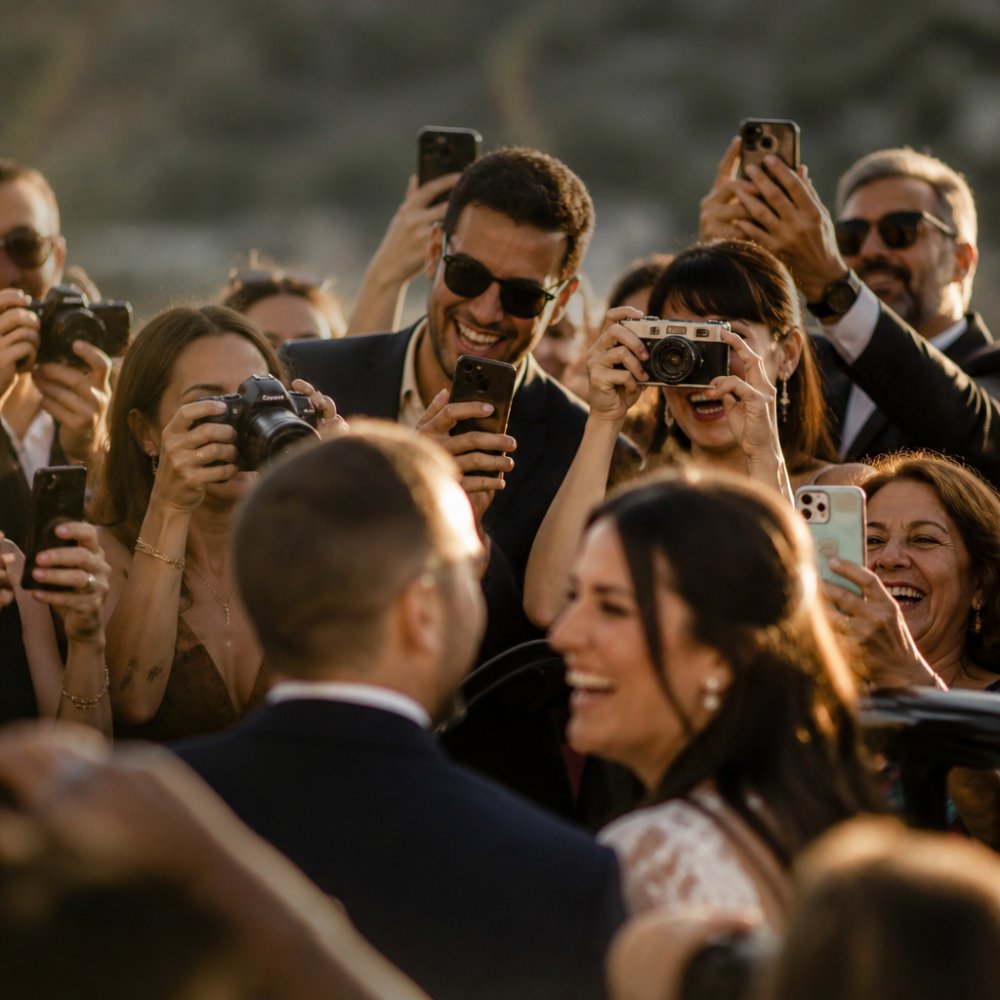
The real difference comes down to authenticity. When people know they’re being photographed by a professional, they often adjust their behavior. They smile for the camera or straighten up. When guests photograph each other, the moments are unguarded. The expressions are real. The interactions feel natural because no one’s thinking about posing for the official record.
Professional photography gives you the polished highlights. Guest photos give you the honest story. Together, they tell the complete picture of what happened and how it felt.
How to Collect Photos from Event Guests
Getting your guests to actually share their photos requires making the process simple. The easier you make it, the more photos you’ll receive. Complexity kills participation. If guests have to download an app, create an account, or figure out a confusing interface, most won’t bother.
The best approach is a single link or QR code. Share it before the event, display it during the event, and mention it in your thank-you message afterward. Guests scan the code or click the link, and they’re immediately able to upload photos directly from their phone. No app. No account. Just select, upload, done.
Here’s what works:
- Share the link early, Send it in your invitation or pre-event message so guests know to expect it
- Display it prominently, Print the QR code on signage at the venue so guests see it during the event
- Make it mobile-friendly, The upload interface must work perfectly on phones since that’s what guests are using
- Keep instructions brief, One sentence explaining what to do is enough
- Remind guests afterward, Send a follow-up message with the link for anyone who forgot to upload during the event
The timing matters too. Most guests upload photos while the event is happening or within 24 hours afterward. After that, momentum drops. People get busy, they forget, or they’ve already shared the images on their personal social media instead.
Event Photo Sharing Ideas That Actually Work
Real-time photo sharing during an event creates energy. When guests see their photos appearing in a shared gallery as the event happens, it encourages more people to upload. It also gives you a live visual record of what’s happening as it happens.
Some events display the shared gallery on a screen or monitor. Guests see their photos appear in real-time and feel excited seeing themselves and their friends in the collection. This creates a feedback loop, more visibility means more uploads.
For events after the fact, a private gallery works best. This is where all the guest photos live in one organized place. Guests can browse, download, and relive the memories. You can share the gallery link with attendees and keep it accessible for months or even years.
Social media sharing is another angle. Some guests want to post event photos on Instagram or other platforms. Make it easy by creating a hashtag specific to your event. Guests use the hashtag when they post, and you can find all the event photos in one searchable location. This spreads awareness of the event beyond just the attendees and creates a trail of public content.
The key is offering multiple sharing options. Some guests prefer uploading to a private gallery. Others want to post publicly. Some do both. The more pathways you create, the more photos you’ll collect.
Event Photography Etiquette for Guests
Not every guest knows the unwritten rules of event photography. Clear expectations prevent awkward moments and ensure everyone’s comfortable being photographed.
The main principle is consent. If someone doesn’t want to be in photos, respect that. Some guests have privacy preferences, religious reasons, or simply don’t like being photographed. Make it easy for them to opt out by mentioning upfront that photos will be taken and shared.
Here’s what to communicate:
- Photos will be taken and shared, Let guests know this is happening so there are no surprises
- Ask before photographing someone up close, A quick „mind if I get a photo?“ takes two seconds
- Respect „no“ immediately, If someone says no, don’t push or try again later
- Avoid photographing people eating or with food in their mouth, Unless it’s a casual, fun event where that’s clearly the vibe
- Don’t photograph children without parent permission, Always ask the parent or guardian first
- Keep cameras out of bathrooms and private spaces, This should go without saying, but it’s worth stating
The tone of event photography matters. If it feels like documentation, guests relax. If it feels like surveillance, they tense up. Casual, friendly photography creates better photos and a better experience for everyone.
Event Photo Collection Tools and Methods
The simplest method is a shared link. Guests click it, upload photos, done. No software to learn, no account to create. This works for most events because most guests have smartphones and can upload directly.
Some events use dedicated photo-sharing platforms. These offer features like organizing photos by event, controlling who can access them, and downloading everything at once. The trade-off is that guests need to navigate a specific tool instead of just clicking a link.
QR codes are effective because they’re visual and immediate. Print the code on cards, signage, or programs. Guests scan it with their phone camera and land on the upload page. It removes the friction of typing a long URL.
Email is another option for smaller events. Send a message to guests with upload instructions and a link. This works well when you have everyone’s email addresses and the guest list is manageable.
For very informal events, a shared folder or cloud service like Google Drive or similar works. Guests upload to the folder, and everything ends up in one place. The downside is that guests need to know the folder link and have the right permissions.
The best tool is the one your guests will actually use. If most of your guests are tech-savvy, a dedicated platform is fine. If you have mixed tech comfort levels, a simple link is better.
Privacy, Permissions, and Photo Management
Privacy concerns are legitimate. People want to know how their photos will be used, stored, and for how long. Being transparent about this builds trust and encourages participation. The difference between a gallery that feels safe and one that feels invasive often comes down to how clearly you communicate consent and control.
Establishing Clear Consent Before the Event
Start by explaining photo collection in your event invitation or pre-event communication. State explicitly that photos will be taken by guests and collected into a shared gallery. This gives attendees time to decide whether they’re comfortable participating. For events where photography is central (celebrations, corporate gatherings), mention it prominently. For more formal or sensitive events, ask guests to opt in rather than opt out, this respects those who prefer not to be photographed.
If your event includes children, always require parental or guardian consent before any child appears in the shared gallery. A simple checkbox in your RSVP form works: „I consent to photos of [child’s name] being included in the event gallery.“ This is not just courteous; it reflects legal expectations around children’s image rights.
Defining Storage, Access, and Retention
Be explicit about where photos will be stored and who can access them. A private gallery accessible only to event attendees is lower risk than public social media posting. If you’re using a third-party platform, state the platform name and note that you’ve reviewed their privacy practices. If you’re storing photos on your own server or cloud service, say so.
Set a clear retention timeline and stick to it. Common approaches include:
- Temporary galleries (30-90 days): Useful for events where photos are meant to be enjoyed briefly, then archived or deleted. Guests know the gallery will close, which can actually encourage faster downloads and sharing.
- Extended access (6-12 months): Gives guests plenty of time to download, share, and relive memories without indefinite storage obligations.
- Indefinite archiving: Only use this if you’ve explicitly told guests the photos will be kept permanently and explained why (e.g., a family reunion archive, a community history project).
When the retention period ends, follow through. Delete photos as promised. If you said they’d be private, do not post them publicly later. Privacy is about keeping your word.
Handling Deletion Requests and Opt-Out
Some guests will ask for their photos to be removed from the gallery after the event. Have a process for this. Make it easy, a simple email request should be enough. When someone asks for deletion, remove their photos within a reasonable timeframe (typically within 7-14 days) and confirm the deletion.
For guests who want to opt out of the shared gallery entirely, respect that choice. If someone says „Please don’t include my photos,“ remove any images of them that have already been uploaded. This requires some manual work, but it’s the cost of operating a trustworthy system.
Data Protection and Third-Party Platforms
If you use a dedicated photo-sharing platform, review its privacy policy and data-handling practices. Key questions to ask:
- Where are photos stored (geographically)?
- How long does the platform retain photos after deletion?
- Can the platform use guest photos for its own marketing or training?
- What encryption or security measures protect the gallery?
- How does the platform handle data requests from law enforcement or other parties?
For events in regulated industries (healthcare, education, finance), or events with sensitive attendees, consider having guests sign a simple photo release form. This clarifies that photos can be taken and used in the shared gallery, and it protects you by documenting informed consent. A one-paragraph form is sufficient; it does not need to be complex.
Public Sharing and Social Media
If you want to post guest photos on your own social media or website, ask first. A simple message works: „We’d love to share some of the great photos from the event on [platform]. May we include photos of you?“ Some guests will say yes; others will say no. Both answers are valid.
If you’re using a hashtag for social media sharing, remind guests that hashtag posts are public. Anyone on the internet can see them. This is different from a private gallery, and guests should understand the distinction before they post.
Accessibility and Inclusive Participation
Not all guests can upload photos via smartphone or web link. Some may have limited connectivity, visual or motor impairments, or simply prefer not to use digital tools. Offer alternatives: guests can email photos to you, hand you a USB drive, or ask a friend to upload on their behalf. This expands participation and shows that you value contributions from everyone, regardless of their technical setup.
Make upload instructions accessible. Use clear, simple language. If you provide a QR code, also provide the full URL in text form. If you have guests who are deaf or hard of hearing, provide written instructions in addition to any verbal announcements about photo sharing.
Organizing and Preserving Guest Photos Long-Term
Once the event is over and photos are collected, the work of preservation begins. Hundreds of photos from dozens of guests can feel overwhelming without a clear system. The difference between a collection you can navigate years later and one that becomes a digital junk drawer is the time you invest in organization immediately after the event.
Immediate Post-Event Workflow
Start organizing within 48 hours of the event’s end, while details are fresh in your mind and you remember which photos matter. Here’s a practical workflow:
- Download everything. Export all photos from your shared gallery or upload platform to your computer. Do not rely on the platform to keep them indefinitely, platforms change, services shut down, and accounts can be compromised.
- Create a master folder structure. Use a naming convention like
[Event Name]_[Date](e.g.,Summer_Celebration_2026-07-15). Inside, create subfolders by category: Arrivals, Ceremony, Food & Drinks, Dancing, Candid Moments, or whatever sections make sense for your event. - Sort photos into folders. This takes time, but it’s the foundation for everything that follows. As you sort, you’ll naturally start removing obvious duplicates and blurry shots.
- Create a metadata file. In a simple text or spreadsheet file, note the event date, location, number of photos, number of contributors, and any special instructions (e.g., „Photos from [Guest Name] include children, check permissions before sharing further“). This becomes invaluable if you need to reference the collection years later.
Deduplication and Quality Control
When multiple guests photograph the same moment, you’ll have near-identical images. Keeping all of them wastes storage and makes browsing tedious. Review similar shots side by side and keep the sharpest, best-composed version. Delete the rest.
Remove obviously blurry, underexposed, or out-of-focus photos. You do not need to be harsh, a slightly soft photo of an important moment is worth keeping. But a completely unusable shot serves no purpose.
If you find inappropriate content (offensive images, photos taken without consent, etc.), remove it from the collection. You can keep a separate archive of flagged images if you need a record, but do not include them in the shared gallery.
File Format and Long-Term Viability
Digital formats change. A format that’s standard today might become obsolete in ten years. To future-proof your collection, store photos in widely supported, non-proprietary formats:
- JPEG: The most universal format. Nearly every device and software can open it. Suitable for most event photos. Use a quality setting of 85-95% to balance file size and image quality.
- TIFF: A lossless format that preserves all original image data. Larger file sizes than JPEG, but no quality loss. Ideal for archival purposes if storage is not a constraint.
- PNG: Good for graphics and images with transparency, but less common for photographs. Use JPEG or TIFF instead for event photos.
Avoid proprietary formats like PSD (Photoshop), HEIC (Apple’s newer format), or RAW files from specific camera manufacturers. If you receive photos in these formats, convert them to JPEG or TIFF before archiving.
Tagging and Searchability
If you have the time and tools, tag people in photos. Most cloud storage services and photo management software (such as Google Photos, Adobe Lightroom, or open-source alternatives like Digikam) support face recognition or manual tagging. Tagging takes effort upfront but pays dividends when you want to find all photos of a specific person or group years later.
Add descriptive keywords to important photos: „First dance,“ „Cake cutting,“ „Group photo,“ „Sunset moment.“ These keywords make the collection searchable and help you tell the story of the event when you revisit it.
Backup Strategy and Redundancy
Events are one-time moments. If you lose the photos, they’re gone forever. Implement a three-copy backup strategy:
- Primary storage: Your main computer or external hard drive where you organize and edit photos.
- Secondary backup: An external hard drive or USB drive stored in a different physical location (e.g., a friend’s house, a safe deposit box, or a secondary residence). This protects against theft, fire, or hardware failure at your primary location.
- Cloud backup: Upload the complete collection to a cloud service (Google Drive, Nextcloud, or similar). Cloud storage is geographically distributed, so even if your local devices fail, your photos survive.
Test your backups annually. Restore a few files from each backup location to confirm they’re actually readable. A backup that you’ve never tested is not a backup, it’s a false sense of security.
Organizing for Sharing
After you’ve organized and deduplicated, create a curated gallery for guests. You do not need to share every single photo, select the best 100-200 images that represent the event’s highlights and moments. This makes browsing faster and keeps the focus on quality.
If you’re using a cloud folder or shared gallery, organize it logically with clear folder names and a brief description of what each folder contains. Add a README file with event details, dates, and any special notes.
Long-Term Archiving
For events you want to preserve indefinitely (family reunions, milestone celebrations, community gatherings), consider creating a dedicated archive. This might be a private website, a shared cloud folder with restricted access, or a physical photo book alongside digital files.
Update your metadata file annually. Note any changes to access permissions, storage locations, or retention plans. If you’re the custodian of the collection, make sure someone else knows where the backups are and how to access them in case something happens to you.
Every few years, review your backup strategy. Technology changes, services shut down, and new tools emerge. What worked five years ago might not be the best approach today. Migrate your collection to new formats or platforms if needed, but always maintain multiple copies and test them regularly.
Sharing Organized Galleries with Guests
Once everything is organized, create a final gallery link or folder access for guests. Include a brief note explaining what they’ll find, how to download photos, and when the gallery will be archived or closed (if applicable). This transforms scattered phone photos into a shared memory that extends the event’s impact long after the day itself.
Frequently Asked Questions
Why are guest photos important at events?
Guest photos capture authentic, unguarded moments that professional photographers often miss. They show genuine reactions, candid interactions between attendees, and behind-the-scenes details that create a complete visual record of your event. Guest photos also increase attendee engagement, people feel invested when their contributions are valued and shared. Together with professional coverage, guest photos tell a fuller story of what actually happened.
How can guests share event photos in one place?
The most effective methods are QR codes linked to a shared gallery, email collections, or dedicated photo-sharing platforms. QR codes placed at key event locations make uploading frictionless, guests simply scan and upload directly from their phones. Shared galleries on cloud storage services work well for smaller events. For larger gatherings, dedicated event photo collection tools streamline uploads, organize images automatically, and let you set privacy controls so only invited guests can access the gallery.
What is good etiquette for guests taking pictures at an event?
Guests should ask permission before photographing others, especially during formal moments like ceremonies. They should avoid blocking sightlines or using flash during performances. Encourage guests to capture candid moments rather than posed shots, and remind them to share photos with the host afterward. Make it clear which areas are off-limits for photography, and communicate any restrictions on where images can be posted publicly. Providing clear guidelines upfront prevents awkward situations and ensures everyone feels respected.
How can you collect photos from guests after an event?
Send a follow-up message within 48 hours with a simple call-to-action and a shared link or upload portal. Make the process as frictionless as possible, avoid requiring app downloads or account creation. Include a deadline so guests know when to submit. Offer multiple submission methods if possible: email, QR code link, or cloud folder. Send a reminder one week before the deadline. Thank guests who contribute and consider sharing the final gallery with all attendees so they see the value of their participation.