
Table of Contents
- What Is a Digital Photo Drop for Birthday Parties?
- Step 1: Choose Your Platform and Cloud Storage Solution
- Step 2: How to Set Up a QR Code for Photo Uploads
- Step 3: Design Your Backdrop and Visual Setup
- Step 4: Set Up Lighting and Environment
- Step 5: Customize Themes, Colors, and Digital Aesthetics
- Step 6: GDPR Compliant Photo Sharing for Events
- Step 7: Launch, Monitor, and Manage Real-Time Uploads
- Post-Event: Digital Asset Management and Photo Access
- Common Mistakes to Avoid
- Frequently Asked Questions
Last Updated: September 30, 2026
What Is a Digital Photo Drop for Birthday Parties?
A digital photo drop for birthday parties is a system that lets guests upload photos directly to a shared online album during your event. Instead of photos scattered across phones and social media, everyone’s pictures end up in one organized place. You set up a QR code at the party. Guests scan it, upload their photos, and boom, instant shared album.
Think of it as a modern replacement for disposable cameras or passing around a physical guest book. The difference? Your photos are instantly accessible, shareable, and backed up. No more hunting through WhatsApp threads weeks later trying to find that perfect shot.
The setup takes about 30 minutes. The payoff is huge: a complete visual record of your party from every angle, captured by people who were actually there.
Step 1: Choose Your Platform and Cloud Storage Solution
Your first decision is picking the right tool for the job. You need two things: a cloud storage service and a way for guests to upload photos. Many people use basic solutions like Google Drive or Dropbox, but those require guests to download apps or navigate confusing folder structures. A better approach uses a dedicated photo-sharing platform built for events.
Look for these features:
- Simple upload process (guests should get it immediately)
- QR code generation (no typing long URLs)
- Mobile-friendly interface (most guests will use phones)
- Real-time photo display (see uploads as they happen)
- Privacy controls (your photos stay private)
Free options exist and work fine for small parties. Paid plans add features like custom branding, advanced privacy settings, and longer storage periods. Choose based on your guest count. A 30-person birthday party has different needs than a 200-person wedding.
The key mistake people make here? Picking something too complicated. Your 70-year-old aunt should be able to upload a photo without calling you for help.
Test your chosen platform with one friend before the party. Have them scan the QR code, upload a photo, and confirm you can see it. This catches technical issues before your guests arrive.
Step 2: How to Set Up a QR Code for Photo Uploads
QR codes are the secret weapon of a successful digital photo drop. They eliminate the friction of typing a long URL. Guests point their phone camera at the code, tap the notification, and they’re uploading.
Here’s how to set it up:
- Create your upload link, Most platforms give you a unique URL for guest uploads
- Generate the QR code, Use a free QR code generator (Google’s QR code generator, QR Code Monkey, or your platform’s built-in tool)
- Test it, Scan the code with your phone to confirm it works
- Print it large, Make it at least 10cm x 10cm so guests can scan from a few meters away
- Display it prominently, Put it near the backdrop, on the food table, and by the entrance
- Add clear instructions, A simple sign: „Scan to share your photos“
Most guests will scan the code once and upload multiple photos throughout the party. Some will forget entirely. That’s normal. Even if only 60% of guests participate, you’ll still get dozens of photos you wouldn’t have otherwise.
The QR code approach works because it removes every barrier. No app download. No email required. No typing. Just scan and upload.
If your QR code doesn’t work, guests won’t bother troubleshooting. Test it multiple times before the party, and have a backup printed copy in case the first one gets damaged.
Step 3: Design Your Backdrop and Visual Setup
Your backdrop is the centerpiece of your digital photo drop. It’s where guests will stand for photos. It’s also where you’ll display your QR code. The design should match your party theme and look good in photos.
Choosing the right backdrop materials depends on your space and budget. Fabric backdrops (like muslin or cotton) are affordable and look professional. They hang easily and fold up for storage. Paper backdrops work too but tear more easily. Vinyl is durable but can look plastic-y in photos. For a DIY approach, a simple colored bedsheet works fine, guests care more about having fun than Instagram perfection.
DIY backdrop construction and assembly is simpler than you think. You need:
- Two stands or a PVC pipe frame (or hang from the ceiling)
- Backdrop fabric or paper
- Clips or tape to hold it in place
- Your printed QR code poster
Assemble it the morning of the party. Test that it’s stable and won’t fall if someone leans against it. Position it where there’s decent natural light, near a window is ideal. Avoid placing it directly under harsh overhead lights, which create unflattering shadows.
Make your QR code poster visible but not distracting. Tape it to the bottom corner of the backdrop or place it on a small stand nearby. Include a one-line instruction: „Scan to upload your photo.“
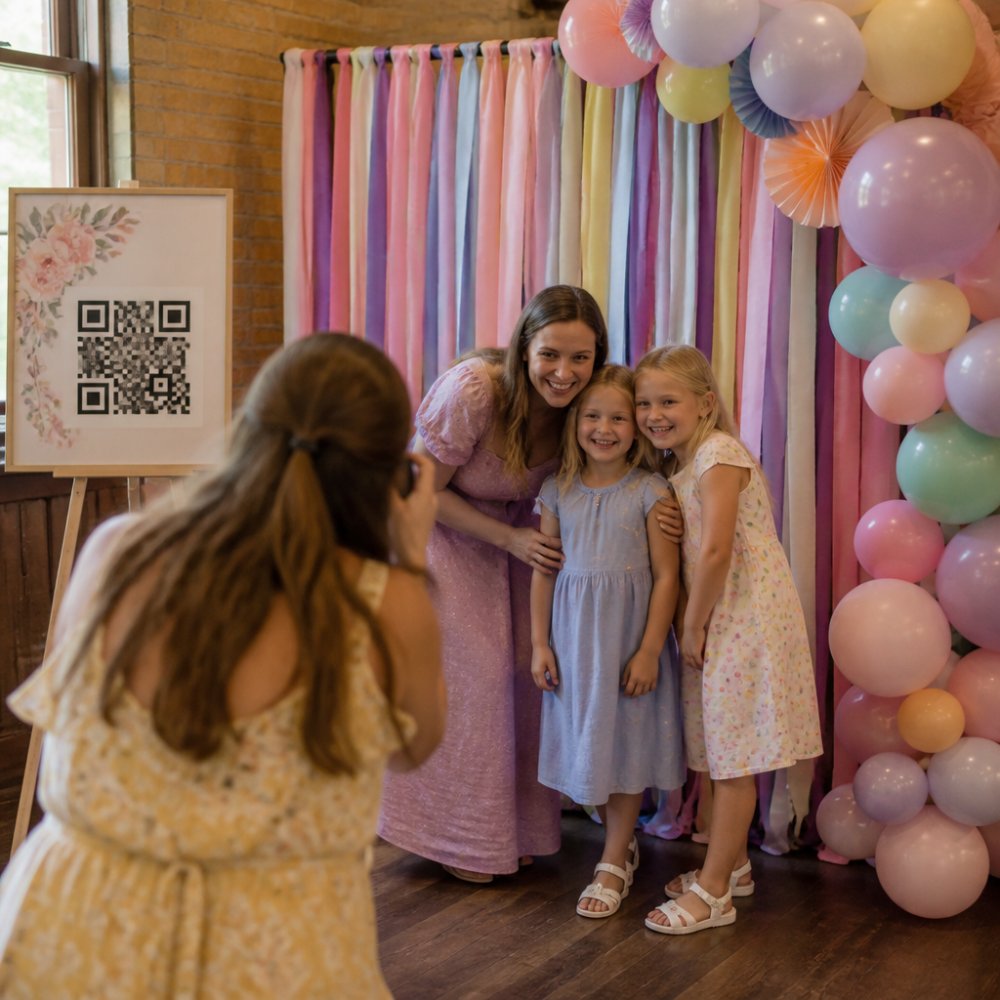
A common mistake is making the backdrop too fancy. Simple, clean backgrounds photograph better than cluttered ones. Guests want to be the focus, not competing with a busy design.
Step 4: Set Up Lighting and Environment
Lighting makes or breaks party photos. Good lighting is the difference between photos people actually want to look at and photos that get deleted immediately.
Natural light is your best friend. If your party is during the day, position your backdrop near a window. If it’s an evening party, you need artificial light. Here’s the setup:
- Avoid direct overhead lights, They create harsh shadows on faces
- Use soft, diffused light, Lamps with fabric shades work well
- Light from the side, This adds dimension and flatters faces
- Test before guests arrive, Take a few test photos to see how people look
The environment around your backdrop matters too. Clear away clutter. Make sure there’s enough space for guests to stand and for others to take photos without getting in the way. A three-meter radius around the backdrop is ideal.
Temperature and comfort affect participation. If your party space is too hot or too cold, guests won’t want to hang around taking photos. Keep the area comfortable.
The best lighting setup is simple: position your backdrop near natural light, add one soft lamp if needed, and test with a friend before guests arrive.
Step 5: Customize Themes, Colors, and Digital Aesthetics
Your upload interface should match your party vibe. Most platforms let you customize colors, add your party name, and choose fonts. This isn’t just vanity, it makes the experience feel intentional and professional.
Customization options typically include:
- Color scheme, Match your party theme
- Party name, Display it prominently so guests know they’re uploading to the right place
- Custom message, A thank-you note or fun instruction
- Branding, Some platforms let you add a logo (your initials, party date, etc.)
Keep it simple. A clean, readable interface gets more uploads than a cluttered one. Guests should understand what to do in two seconds.
The aesthetic matters because it signals that you’ve put thought into the experience. A generic interface feels like an afterthought. A customized one feels intentional.
Test how the interface looks on a phone. That’s how 95% of your guests will see it. If text is too small or buttons are hard to tap, people will give up.
Step 6: GDPR Compliant Photo Sharing for Events
If you’re hosting in Germany or inviting guests from the EU, you need to follow GDPR rules. This isn’t optional, it’s the law. The good news: it’s not complicated.
GDPR compliance for your digital photo drop means:
- Get consent, Tell guests that photos will be collected and stored digitally. Include this in your invitation or on a sign at the party
- Store securely, Use a platform with encryption and secure servers. German-hosted platforms are ideal
- Set an expiration date, Decide how long you’ll keep the photos (e.g., one year) and communicate this
- Allow deletion, Guests should be able to request that their photos be deleted
- Protect privacy, Don’t share photos publicly without explicit consent
Many platforms now offer GDPR-compliant options. When choosing your platform, ask about their data handling practices. Where are servers located? How long do they store data? What happens if someone asks for their photos to be deleted?
The legal framework here is the GDPR regulations on personal data processing. Your photo upload system collects personal data (images of people’s faces). That requires a legal basis for processing. Consent is the simplest basis.
A simple consent statement works: „By uploading photos, you consent to these images being stored and shared with other party guests for one year.“
Ignoring GDPR compliance can result in fines and legal trouble. If you’re unsure, consult with a data protection officer or lawyer. It’s worth the peace of mind.
Step 7: Launch, Monitor, and Manage Real-Time Uploads
The party has started. Your backdrop is set up. Your QR code is displayed. Now what?
During the party:
- Monitor uploads in real-time, Most platforms show a live feed or notification when new photos arrive
- Troubleshoot if needed, If a guest can’t upload, help them or provide an alternative (email, USB drive, etc.)
- Encourage participation, Mention the QR code during the party. Say something like, „Don’t forget to scan and share your photos!“
- Take screenshots or backups, Some platforms let you download all photos during the event
Real-time monitoring lets you see how many guests are participating. If uploads are slow, you might mention it again or help someone scan the code. Most platforms show upload counts, which is motivating, guests see others uploading and want to participate.
Have a backup plan. If the internet goes down or the platform crashes, you need an alternative. A USB drive or email address where guests can send photos works in a pinch.
The monitoring process is simple: check the platform every 30 minutes, confirm uploads are working, and enjoy your party. You don’t need to babysit it.
Post-Event: Digital Asset Management and Photo Access
The party’s over. Now you have dozens or hundreds of photos. What’s next? This is where most guides stop, but it’s actually where the real value emerges. A thoughtful post-event workflow transforms raw uploads into a curated memory archive that guests actually want to revisit.
Immediate download and backup (within 24 hours):
Don’t leave photos on the event platform longer than necessary. Download all images to your computer immediately. Most platforms offer a bulk download option, look for an „Export“ or „Download All“ button in your account settings. If your platform doesn’t offer this, download photos manually in batches.
Create a folder structure on your computer:
Common Mistakes to Avoid
Learning from others‘ mistakes saves you time and frustration. Here are the ones that come up repeatedly:
Not testing the QR code beforehand. You test it with one phone and assume it works everywhere. Test with at least three different phones and brands. Some older phones struggle with certain QR code formats.
Making the QR code too small. Guests can’t scan what they can’t see. Print it at least 10cm x 10cm. Bigger is better.
Poor lighting on the backdrop. You set up the backdrop in a dark corner and wonder why photos look terrible. Lighting is everything. Move it to a better spot or add a lamp.
Complicated upload process. You choose a platform that requires an account, email verification, or multiple steps. Guests give up. Simpler is always better.
Not mentioning the QR code during the party. People get distracted. Remind them once or twice. A simple announcement works: „Hey everyone, don’t forget to scan the QR code and upload your photos!“
Forgetting to get consent. You collect photos without telling guests. This is a GDPR violation and damages trust. Always ask permission upfront.
Leaving photos on the platform forever. The platform changes terms, gets hacked, or shuts down. Download your photos and back them up immediately.
Not having a backup plan. Internet goes down. Platform crashes. Someone’s phone doesn’t work. Have a USB drive or email address ready.
Choosing a platform based on price alone. The cheapest option might be unreliable or have poor privacy practices. Spend a bit more for something dependable.
The pattern here is simple: test everything beforehand, keep it simple for guests, and back up your photos. That covers 90% of problems.
Setting up digital photo drop birthday parties turns casual snapshots into an organized, shareable memory bank. The process takes less than an hour of prep, and guests appreciate how easy it is to participate. Start with a reliable platform, design a simple backdrop, and test your QR code before the party begins. The result? A complete visual record of your celebration, captured by everyone who was there. Get started today and watch how many more photos you actually end up keeping from your event.
Frequently Asked Questions
How do I create a digital photo drop for guests to upload images?
Start by selecting a photo sharing platform or cloud storage service that supports guest uploads via QR code or direct link. Generate a unique QR code pointing to your upload folder, print it on a large poster, and display it prominently at your party venue. Guests scan the code with their phones and upload photos directly. The entire process takes 15-30 minutes to set up and requires no app downloads from guests.
What are the best photo sharing apps for events that protect guest privacy?
Choose platforms that offer GDPR compliance and data encryption, especially if your guests are in Europe. Look for services with customizable access controls, password protection, and clear data retention policies. Many affordable options provide free plans for small events with limited uploads, making them budget-friendly for birthday parties. Verify that the platform stores data locally rather than on international servers.
How long should I keep photos after the event, and how do I manage them afterward?
Most services retain photos for 30-90 days by default, but you can extend this by downloading everything to your personal storage immediately after the event. Create organized folders by date and guest, then back up to external drives or local cloud storage. This ensures you have permanent access while freeing up space on the event platform. Document the download process before the party so you know your retrieval timeline.
Will my guests actually use a QR code to upload photos, or will they forget?
Guest participation typically increases when you announce the QR code during the party, display it in multiple locations, and remind guests verbally or via printed materials. Expect 40-60% of guests to participate, depending on age group and tech comfort. Pairing the QR code with a physical photo booth backdrop encourages people to upload immediately after taking pictures, rather than forgetting later.